Windows 11 originally has relatively less bloatware than Windows 10 but still debloating Windows 11 from resource-hogging apps and services is a good option to increase the speed of your computer and improve its performance. If your PC is a bit old and needs a performance boost then by following this guide you can debloat Windows 11 to improve performance and keep your Microsoft OS lightweight.
Steps to Debloat Windows 11 to improve performance
We will be using the Windows10debloater. It is a popular script that has been developed by Syncex. This debloat script is mainly for Windows 10 but it can work well with Windows 11 as well. This is capable of getting rid of a large number of unnecessary packages that keep engaging with the resources.
As this script is not exactly made for Windows 11, it lacks a few Windows 11-centric changes like removing the stubs and cleaning up the start menu but hopefully, these features would be added to the program with the next update. Let’s now learn to debloat Windows 11 to improve performance without any further delay.
Note: You are suggested to move with caution as even though the script has been tried and tested, it might break things! Caveats are added as to where Windows to tread carefully in the given steps, so ensure you follow all the steps without missing out on anything. If your computer is old then this guide will help you in improving your Microsoft OS but it is suggested that you do it at your own risk.
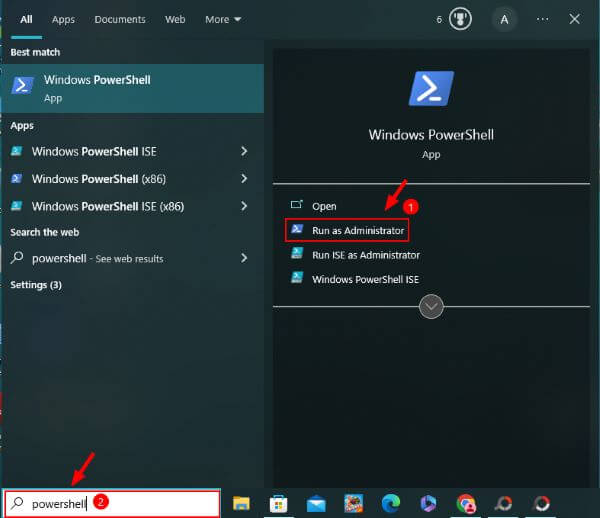
- In the Windows search bar, type POWERSHELL by first clicking the Windows key once. Select the “Run as administrator” option that can be found on the right panel, from the search results.
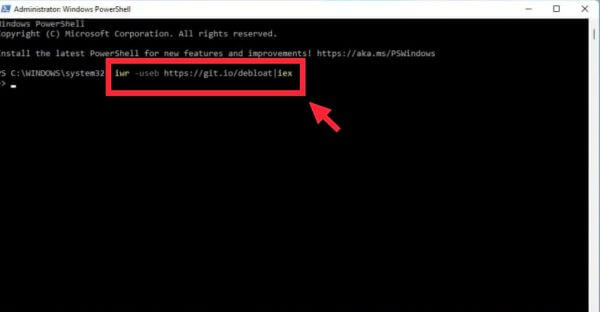
- Now copy and paste the command given below into the Powershell window. Next, click on the Enter key. Now the Windows 11 debloater script will automatically be downloaded from the internet and the program will be launched within a few seconds. In case anything goes wrong while following these steps then, you have nothing to be worried about as a System Restore Point is also created by this command that will help you to easily go back to a working build.
iwr -useb https://git.io/debloat|iex
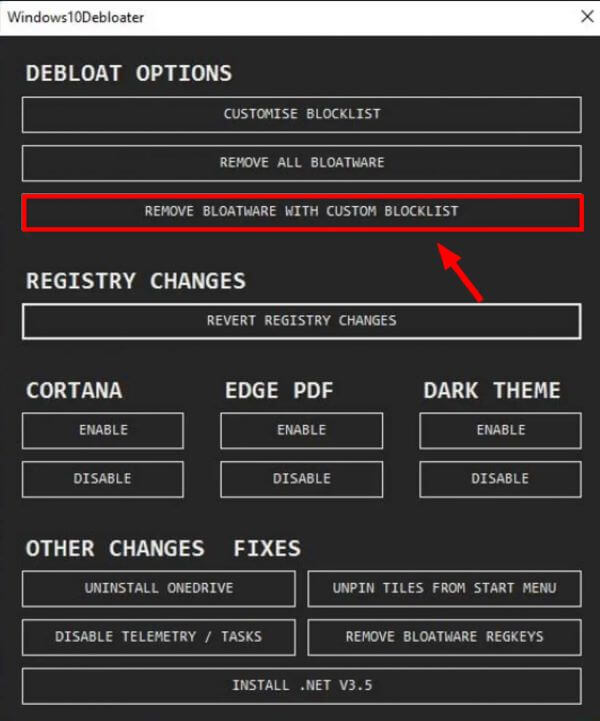
- Windows10debloater will open up once this command has been executed successfully. You are now suggested to “Disable Cortana” if you do not use Microsoft’s voice assistant. The service will be completely wiped off from the background in a few seconds through this step.
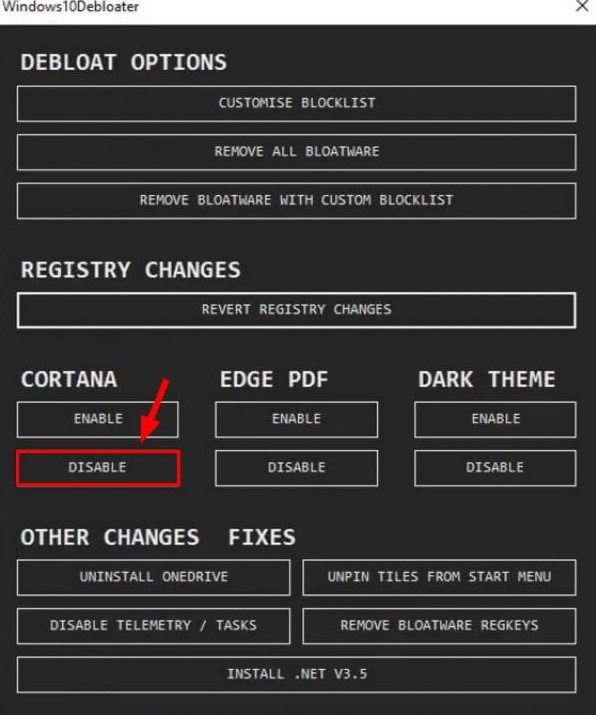
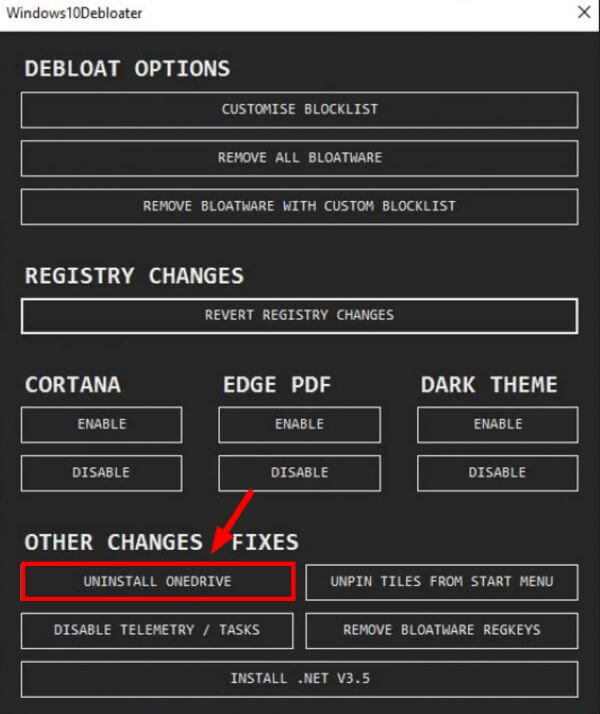
- Next, you must select “Uninstall ONEDRIVE” if you do not use it on your Windows PC. By doing this, you can get rid of random backup prompts and ONEDRIVE will no longer pop up on startup.
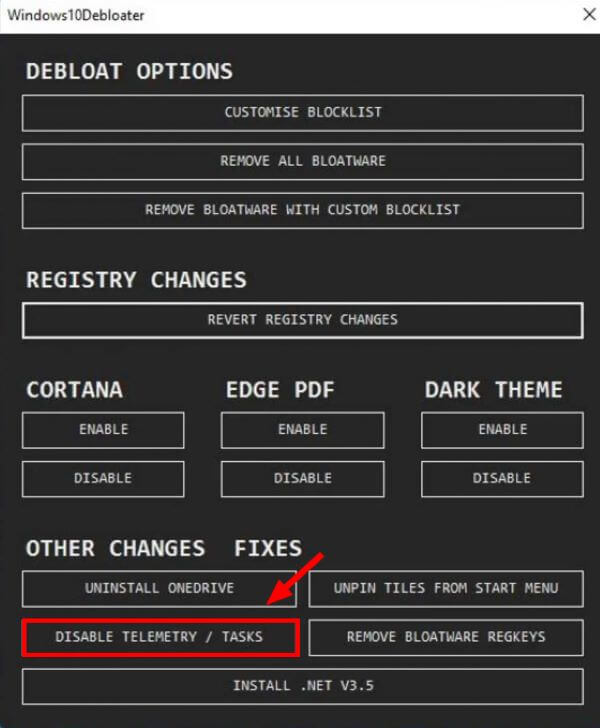
- The next step is to click on the “disable telemetry/tasks” option to stop all the background tracking services that are run by Microsoft. This step is quite an important one as it stops any type of data harvesting thereby protecting your privacy. After doing this you’ll realize that your PC’s resources have been considerably freed up.
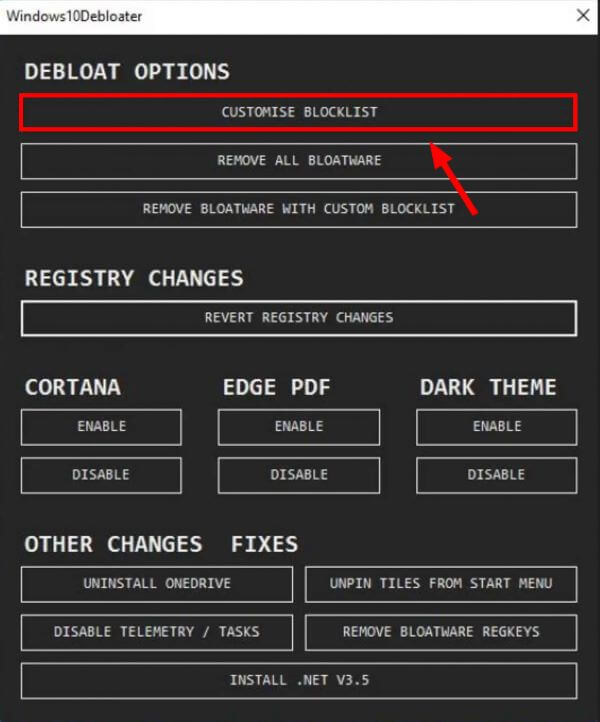
- Finally, it’s time to debloat your Windows 11 PC from unwanted packages and Applications. You’re suggested to not delete all bloatware at once as the configuration of the list is for Windows 10 and choose the “customize blocklist” option instead.
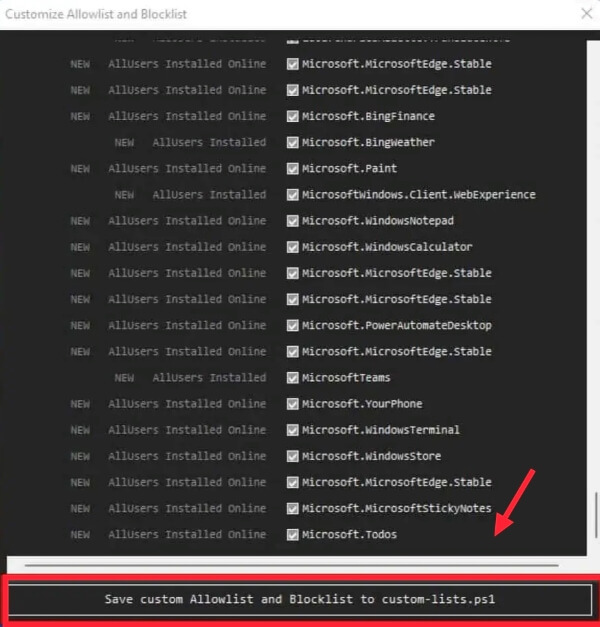
- In this step, you need to go through the entire list and check the boxes of all the applications and packages that are not needed by you.
For example, if the list is removing any essential app like the Microsoft Store, paint, calculator, photos, edge, etc then you need to untick them. If you don’t use any app then you can tick them like the Xbox, if you don’t use your PC for gaming however if you’re not sure about any application then it’s better to keep them unticked to be on the safer side. When you’re done checking the boxes of all unwanted apps, you need to click on the “save custom…….” Option present at the bottom of the screen.
Note: Ticking or checking the box of any application removes it and keeping it unchecked or unticked keeps the application in your PC.
- The next step is to select “Remove bloatware with custom blocklist”. This step will take quite a few minutes, and then you can restart your pc. Once you’ve restarted your pc, you’ll find out that the performance of your PC has improved and your pc has now been debloated.
- Instagram, Facebook, etc might still be found on your start menu after you’ve debloated your PC. This is because they are not existing apps but stubs to download a program. If you want to remove these stubs, you can right-click them and uninstall them.
Remove Bloatware and Stop Tracking Services on Windows 11
By following the steps given above, you can easily remove all the junk that usually comes pre-installed on your PC. With these steps, you can also remove the background tracking services and other telemetry services that take up too much space.
The thing to note here is that by removing these applications and packages, you’re not just temporarily offloading them but removing them from the registry. So the possibility of these services starting on your PC automatically in the future is null. Hope this guide helped you to debloat Windows 11 to improve the performance of your PC.