Are you wondering how to reinstall Minecraft on Windows 11? We will help you understand both the basics of Minecraft and its setup. It is a very popular game lately that has grabbed everyone’s attention. It’s an open-world sandbox game where you can create your own world, and the best thing is that you have numerous sources.
As a result, everyone in gaming has a thrust towards this. But, at many events, uninstalling a game is required. In that case, you can remove the game for the time being and then reinstall it.
However, many users come up with errors, bugs, and other issues after reinstalling the game. Don’t worry! We have fixes for them as well. Keep reading the guide to the end and you’ll learn to reinstall Minecraft and fix issues that come up after installing it.
How to install Minecraft in Windows 11?
You can get the Minecraft app from the Microsoft app store. Download the game and tap on the single launcher to play the game. When you launch the game, you can play your desired version of it.
Steps To Reinstall Minecraft On Windows 11
The reasons for reinstalling Minecraft on Windows 11 can be any of these:
- The current configuration has not been updated to reflect the most recent release, or
- There is a problem with the installed Minecraft on your system.
Whatever it is, here is the stepwise process to reinstall it on your system.
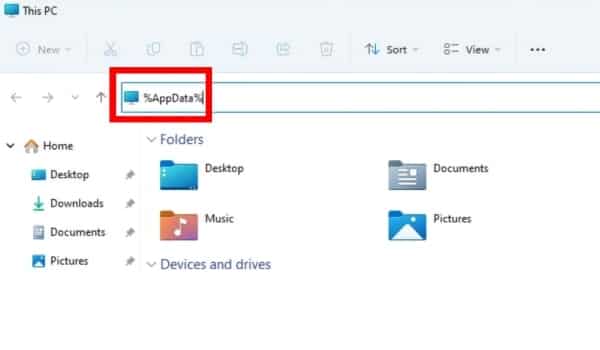
- To begin, launch File Explorer by pressing the Windows + E keys. You can go to This PC icon and double-tap on it. Now, go to the address bar or press the Alt+D keys on the keyboard and then, type in %AppData% in the bar and press the enter button.
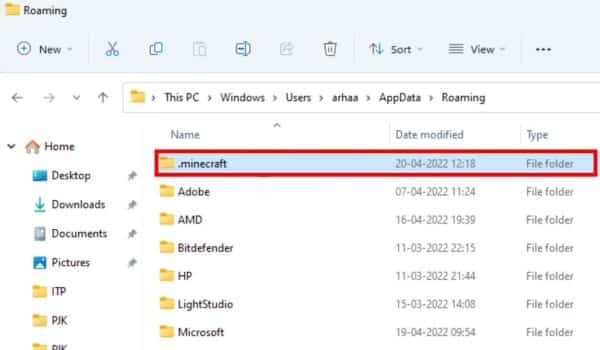
- This will open the AppData directory on your screen. Find the .minecraft folder and right-click to open the context menu. After that, select the Trash icon and delete the directory from your computer.
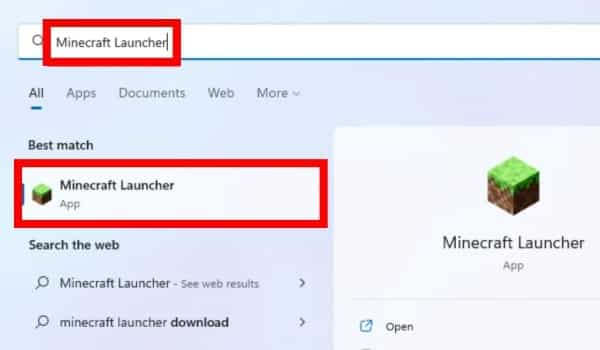
- Moving forward to the Start menu, type and search for Minecraft Launcher. Open the Minecraft Launcher app.
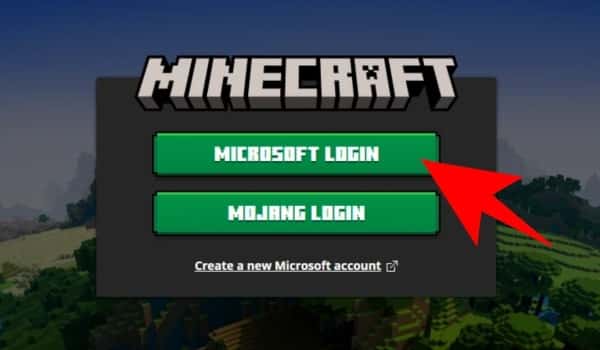
- Log in to the app using your Microsoft account.
- Thus, tap on the Microsoft login option to access the Xbox account.
- After logging into the account, select a Minecraft edition. You can find this in the left sidebar.
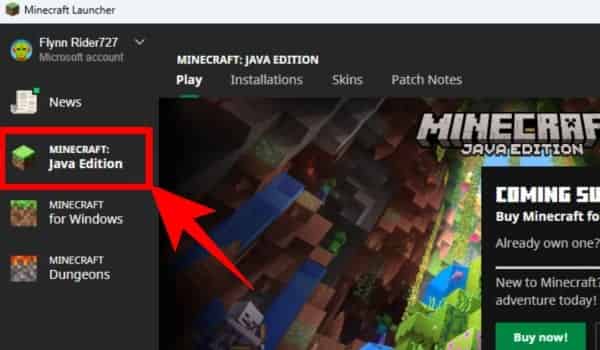
Lastly, tap the Play button to start the game on your Windows 11.
Reinstall Minecraft without losing game progress
If you have already installed Minecraft but are facing issues, you need to reinstall it. However, if you are concerned about your gaming progress, don’t worry! We have a solution for that too. Following the steps below, you can safeguard your progress and reinstall Minecraft.
- Press Windows + E to launch the Explorer window. Now, tap on the address bar and type %AppData%. Then, press the enter button. It will take you to the directory.
- In the directory, find the .minecraft folder and copy it. For that, right-click on it and select the copy option. Paste this folder where you can easily access it. Don’t forget to permanently delete the .minecraft folder by pressing the Shift + Delete keys in the %AppData% folder after copying it.
- Now, click on the Start button. Type Minecraft and open the Minecraft launcher.
- Now, log in to the account using your Microsoft credentials. Thus, tap Microsoft Login to sign into your Xbox account.
- After the launcher is visible, select the edition of the game. You can find the editions on the left sidebar. Now, tap the Play button located on the right side of the window. It will start downloading the latest edition of Minecraft. Wait for the download to finish and it will launch the game itself. Close the game and also exit the launcher.
- Now, go back to the %AppData% directory and paste the .minecraft folder you copied earlier.
Once you’ve done the steps mentioned above, launch Minecraft from the Minecraft Launcher. You will see that it will have your saved progress.
Getting an error in launching Minecraft?
As discussed above, sometimes users encounter an error either in installing or launching the game. In any case, you can use these solutions and fix the issue.
Solution 1: Restart the Computer
Let’s start with the primary solution. Restarting the computer can fix several issues, including Minecraft. To do so, tap the Start button and select the Restart option. It will resolve any temporary glitches in the system. After restarting, go to the Minecraft launcher and see if it works.
Solution 2: Update your system
The compatibility of the system is very crucial for running the game. Thus, ensure your system is up-to-date or check for the latest updates on your system.
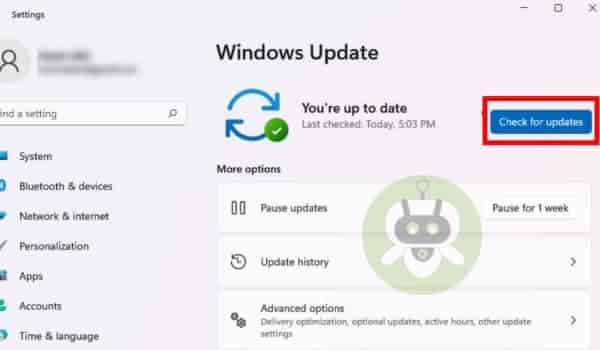
- Open Windows settings by pressing the Windows + I keys.
- Now, tap on the Windows Update. If there are available updates, download and install them on your system.
- Now, try rerunning the installer.
Solution 3: Run the Minecraft installer as an admin
An issue in running the Minecraft installer may appear if you’re not logged in as an administrator. Hence, follow these steps and run the game as an admin:
- Go to the Start button.
- Type Minecraft Installer in the search bar.
- Select Run as Administrator.
Solution 4: Run Minecraft in compatibility mode
You may try to launch the Minecraft installer in compatibility mode. This solves any technical issues and makes it easy to access the game. If you are not aware of the steps, read below:
- Go to Minecraft.exe > Properties > Compatibility > select OS from the drop-down menu.
- Select the box that says disable full-screen optimization, click on Apply, and then the OK button.
Solution 5: Check if the Windows installer window is running
Lastly, see if the Windows Installer service is running. To check, go through the steps below:
- Open the Run dialog box by pressing Windows + R, type MSIExec and press the OK button.
- It will open the Windows installer window that has MSIExec details.
But, if it doesn’t open the window and shows an error, start it manually.
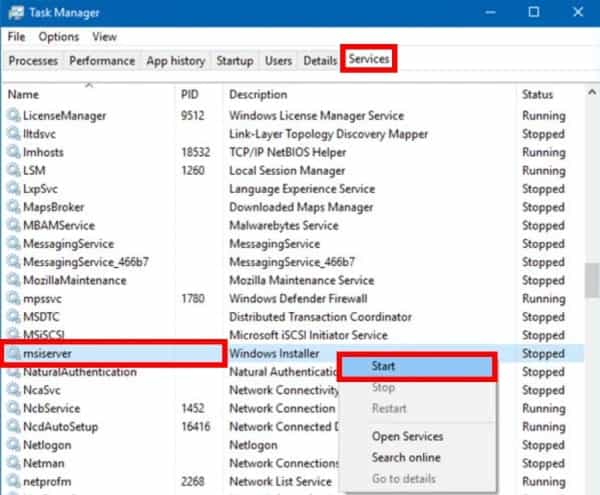
- Go to the Start button > type Task Manager and open the program.
- Move to the Services tab and locate msiserver and right-click to start it.
- Also, run the services.msc and Windows Services will open.
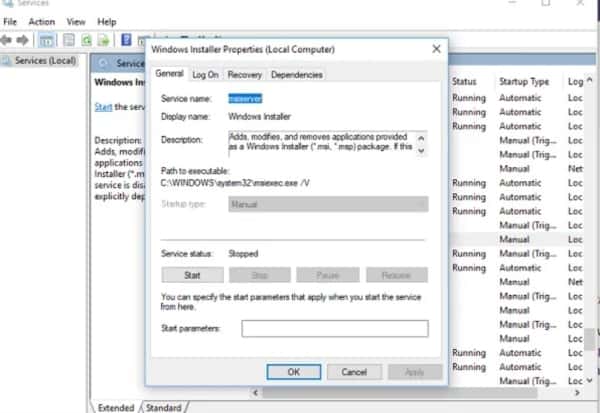
- Go to the Windows Installer and restart the game.
Wrapping Up
We hope this article helps you with how to reinstall Minecraft on Windows 11. You can install the setup or reinstall it without losing the game progress. Besides that, if you face any problems in accessing the launcher, the solutions are mentioned above. For more help, you can contact the official Minecart support.