
A variety of features, including a user-facing option to enable DNS over HTTPS and personalize touchpad movements, are now available in the new Settings app in Windows 11. However, on Windows 11, several hidden functions can only be turned on or off using the trusted Registry Editor. It enables you to reactivate vital functions that Microsoft had removed or concealed for Windows 11 to make room for them. With these best Registry hacks for Windows 11, you can also disable resource-hungry services. So let’s get started and discover the best registry hacks for Windows 11 to learn more.
List Of Best Registry Hacks For Windows 11
The best Registry hacks for Windows 11 that continue to function on the most recent stable release of Windows 11 are listed in this post. We have covered all the Registry tips you should be aware of, from restoring outdated features to modifying UI elements in Windows 11. You can navigate to the desired area by expanding the table below. But first, make sure to create a restore point using the instructions below
Create A System Restore Point In Windows 11
You should make a system restore point on Windows 11 first to be on the safe side before continuing. If a Registry modification results in any problems with your PC, you may easily return it to its previous functional form. The steps that you must take are listed below.
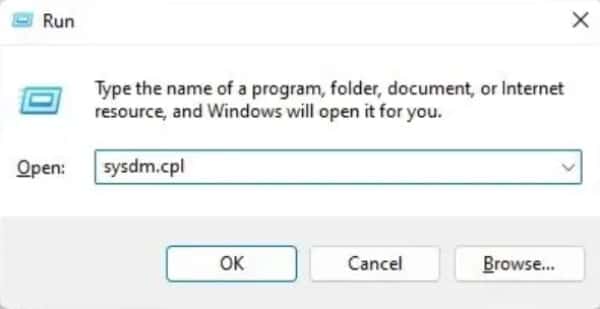
- To open the Run prompt, press the Windows + R keyboard shortcut in Windows 11. Enter sysdm.cpl into this field.
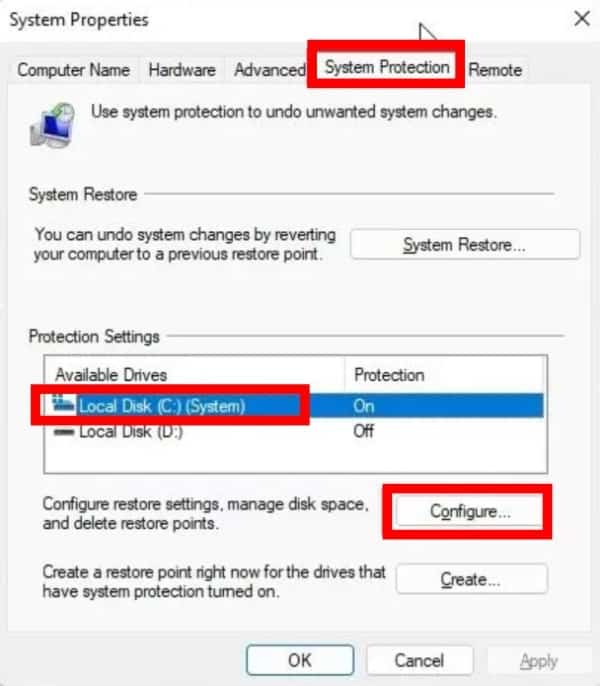
- After that, select your C drive under the System Protection tab and press Configure.
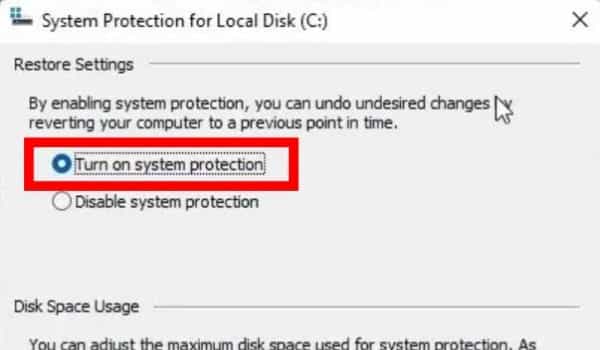
- Next, choose Enable system protection and then press OK. You can make a restore point on your Windows 11 machine after you’ve enabled system protection.
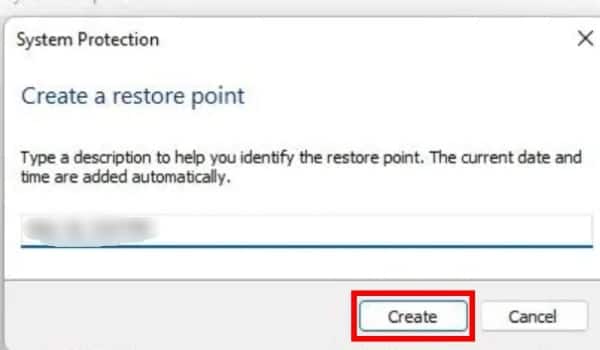
- Select Create from the System Protection tab.
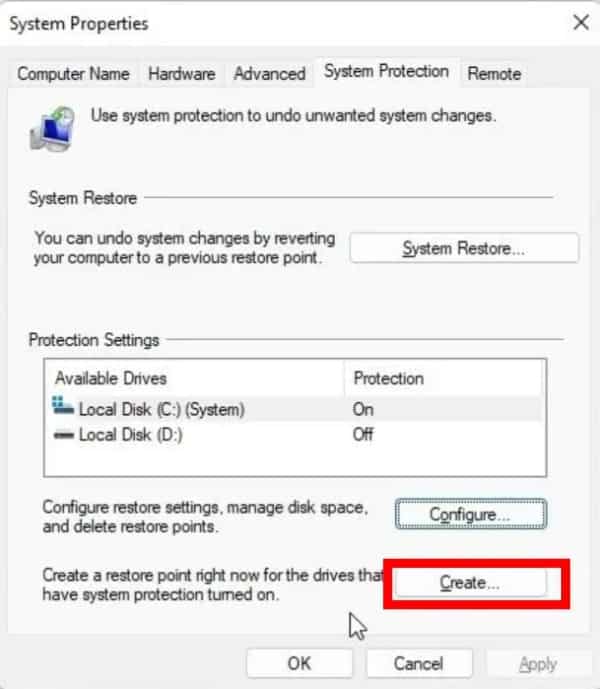
- Here, give the restore point a name. To correctly recall the restoration point, don’t forget to include the date and time. You can now click Create to finish in a matter of seconds.
1. Add any program to Windows 11 context menu
With the help of this Registry hack, you may add your preferred application, such as NotePad or a media player, to the right-click menu in Windows 11. You can immediately launch your preferred program by doing a simple right-click. To access your preferred software, keep in mind that these shortcuts were added to the previous context menu, so click Show more alternatives. Here is how to configure it.
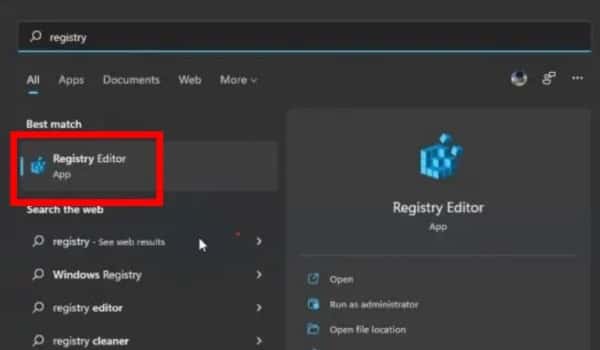
- Type registry after pressing the Windows key once. Open the Registry Editor right now.
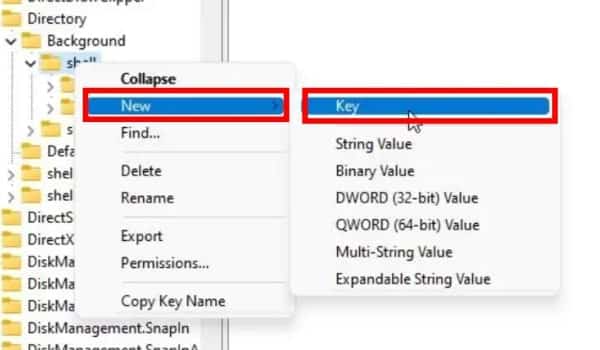
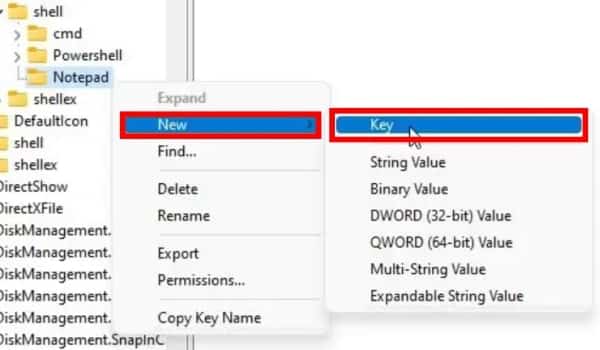
- Next, paste the path shown below into the address bar of Registry Editor. After arriving here, select New > Key by performing a right-click on the shell.
Computer\HKEY_CLASSES_ROOT\Directory\Background\shell
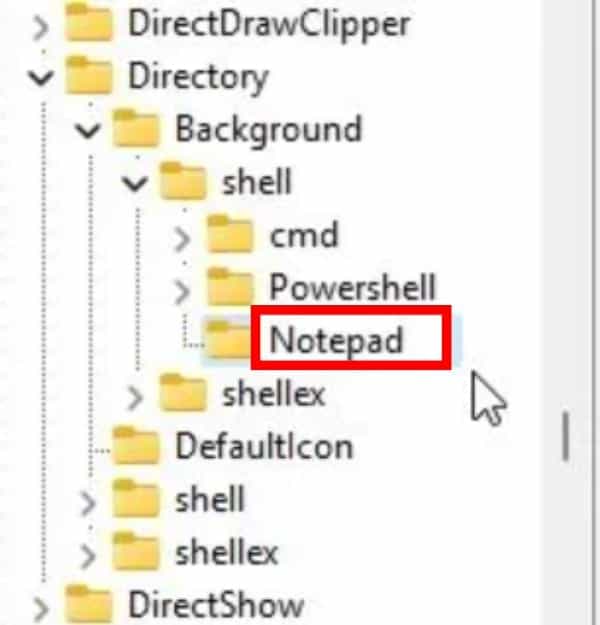
- Next, name the desired program from the context menu. For instance, we are putting a shortcut to Notepad.
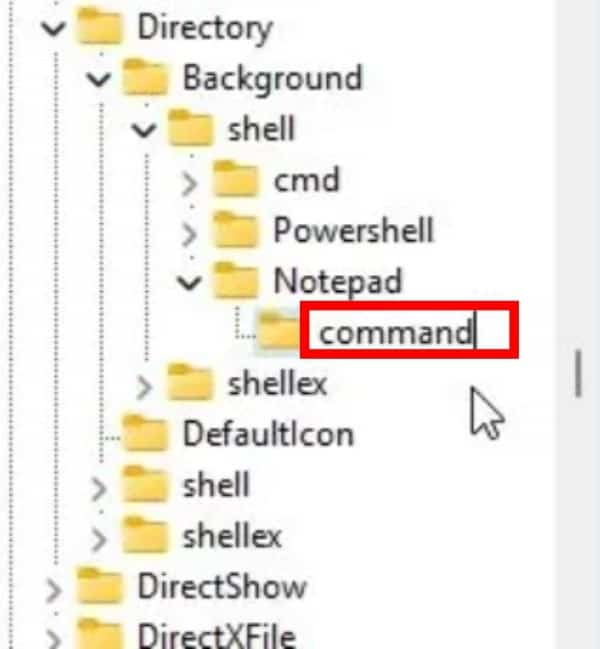
- Next, right-click the newly created entry (Notepad) and select New > Key once more.
- Change the key’s name to command.
- After that, open the Default file under command, paste the program’s executable path in Value data, and then close the file.
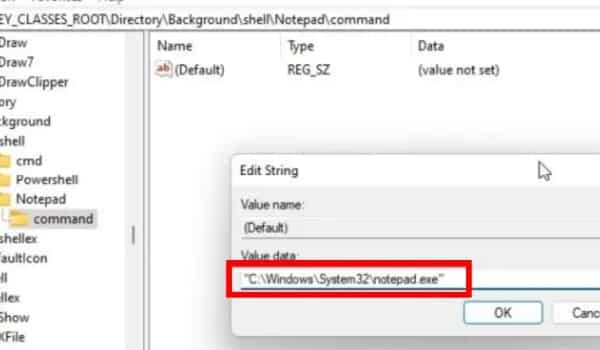
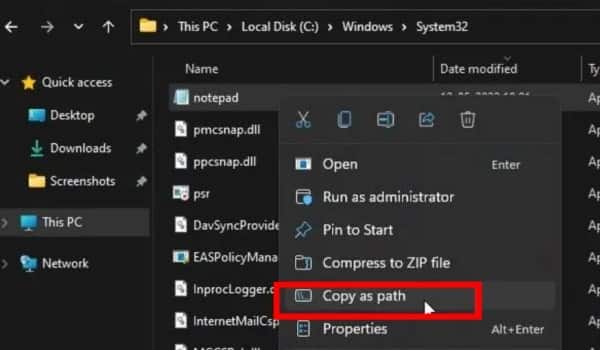
- To find the executable address, use the right-click menu to open the file location on any program. Select Copy as path from the context menu when you right-click on the EXE file.
- Right-click on the Desktop after dismissing the Registry Editor. Select Show additional options to reveal the new program that has been added to the Windows 11 context menu as a result of the Registry hack you just used.
2. Enable Windows Photo Viewer in Windows 11
If the Photos app on Windows 11 is making you impatient, don’t panic. From Windows 7 to Windows 11, you may still download the dependable Windows Photo Viewer. You’ll find it to be the greatest photo viewer on Windows 11 quite fast, I’m sure. So, go ahead and use your computer to test out the best Registry hacks for Windows 11.
- Start by opening Notepad on your computer and pasting the following commands into the newly created document.
Windows Registry Editor Version 5.00

[HKEY_CURRENT_USER\SOFTWARE\Classes\.bmp]
@="PhotoViewer.FileAssoc.Tiff"

[HKEY_CURRENT_USER\SOFTWARE\Classes\.gif]
@="PhotoViewer.FileAssoc.Tiff"

[HKEY_CURRENT_USER\SOFTWARE\Classes\.ico]
@="PhotoViewer.FileAssoc.Tiff"

[HKEY_CURRENT_USER\SOFTWARE\Classes\.jpeg]
@="PhotoViewer.FileAssoc.Tiff"

[HKEY_CURRENT_USER\SOFTWARE\Classes\.jpg]
@="PhotoViewer.FileAssoc.Tiff"

[HKEY_CURRENT_USER\SOFTWARE\Classes\.png]
@="PhotoViewer.FileAssoc.Tiff"

[HKEY_CURRENT_USER\SOFTWARE\Microsoft\Windows\CurrentVersion\Explorer\FileExts\.gif\OpenWithProgids]
"PhotoViewer.FileAssoc.Tiff"=hex(0):

[HKEY_CURRENT_USER\SOFTWARE\Microsoft\Windows\CurrentVersion\Explorer\FileExts\.ico\OpenWithProgids]
"PhotoViewer.FileAssoc.Tiff"=hex(0):

[HKEY_CURRENT_USER\SOFTWARE\Microsoft\Windows\CurrentVersion\Explorer\FileExts\.jpeg\OpenWithProgids]
"PhotoViewer.FileAssoc.Tiff"=hex(0):

[HKEY_CURRENT_USER\SOFTWARE\Microsoft\Windows\CurrentVersion\Explorer\FileExts\.bmp\OpenWithProgids]
"PhotoViewer.FileAssoc.Tiff"=hex(0):

[HKEY_CURRENT_USER\SOFTWARE\Microsoft\Windows\CurrentVersion\Explorer\FileExts\.jpg\OpenWithProgids]
"PhotoViewer.FileAssoc.Tiff"=hex(0):

[HKEY_CURRENT_USER\SOFTWARE\Microsoft\Windows\CurrentVersion\Explorer\FileExts\.png\OpenWithProgids]
"PhotoViewer.FileAssoc.Tiff"=hex(0):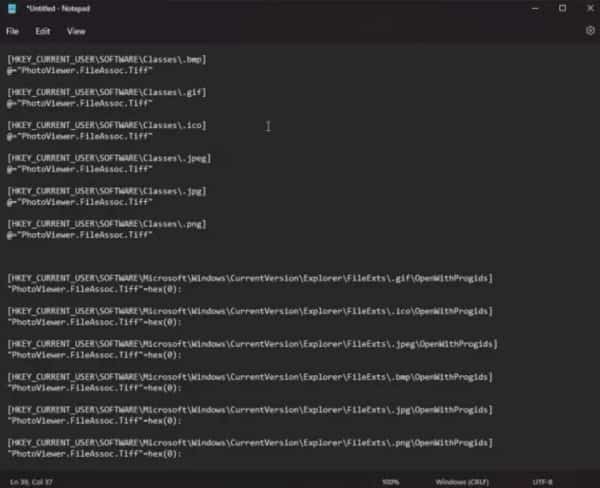
- Now, click on File > Save as.
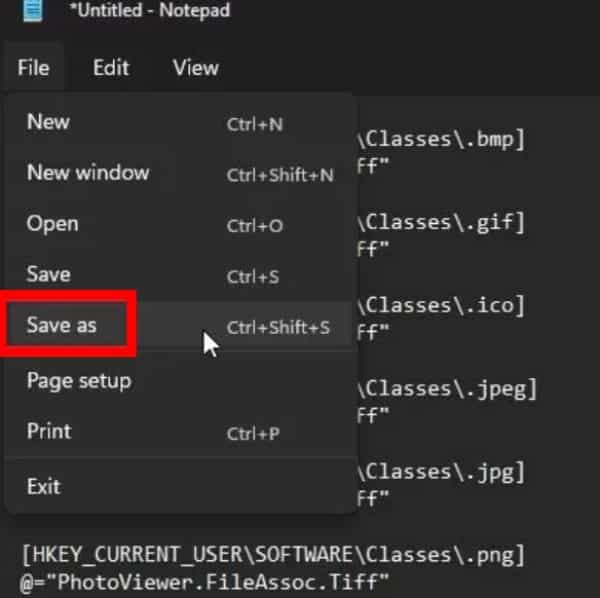
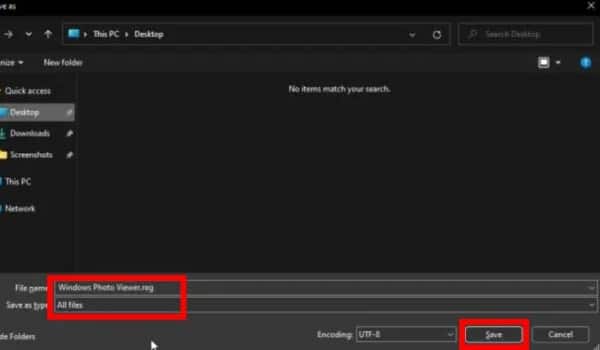
- Give the file a name and select All files from the Save as type drop-down menu. We used the filename Windows Photo Viewer as an example. Then, to create a Registry file, add .reg to the end of the file name and select Save.
- Now, go to the folder where you saved the .reg file now. After that, double-click the file to execute the registry instruction and click Yes. The entries will be merged with your Registry as a result.

- After that, right-click any image and select Windows Photo Viewer to view it. Images will open instantly when using the Windows Photo Viewer. Enjoy!
3. Disable Bing search from Windows 11 start menu
Although the Windows 11 Start menu has been updated, we don’t appreciate that it also retrieves results from Bing whenever we perform a local search. It slows down and frustrates the entire search process. Therefore, you can follow the thorough instructions in our linked tutorial if you want to remove the Bing search from the Windows 11 Start menu. To remove Bing search results from the Start menu, the steps are illustrated here.
- Start the Registry Editor, then navigate to the location below.
Computer\HKEY_CURRENT_USER\Software\Policies\Microsoft\Windows
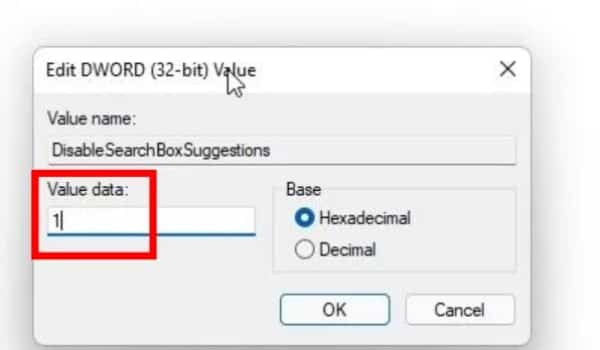
- Make a new key here called Explorer. Then, create a new DWORD (32-bit) value and rename it to DisableSearchBoxSuggestions in the right pane of Explorer after that.
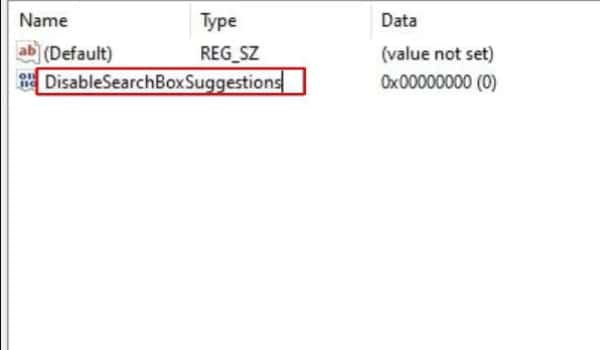
- Change the Value data to 1 and double-click to open DisableSearchBoxSuggestions.
- Restart your Windows 11 computer to completely remove Bing Search from the Start menu, thanks to this Registry hack.
4. Remove the “System Requirements Not Met” watermark in Windows 11
Microsoft has begun applying a ‘System requirements not met‘ watermark to PCs that don’t meet the updated minimum system requirements for Windows 11. Some people are unhappy with this and want the watermark removed from the Desktop and Settings app. Thankfully, you can simply get rid of the “System requirements not met” watermark in Windows 11 by using this Registry trick.
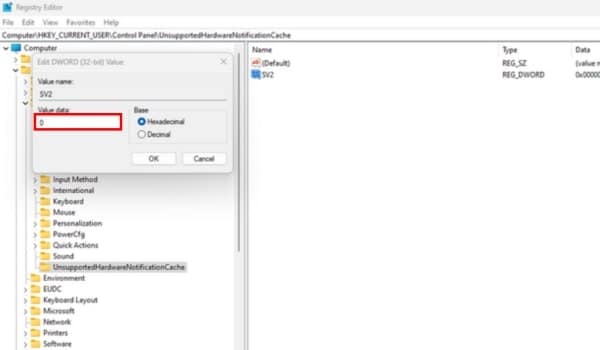
- Launch the Registry Editor and go to the path listed below.
Computer\HKEY_CURRENT_USER\Control Panel\UnsupportedHardwareNotificationCache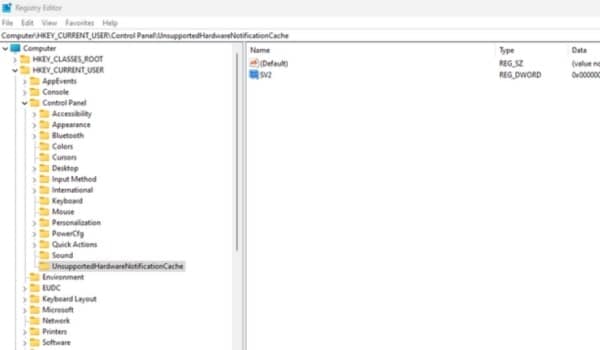
- When you get to this point, the right pane will either have “SV1” or “SV2” entries. Open it and enter 0 for the value data. Now, restart your machine, and Windows 11 will no longer display the watermark saying System requirements not met.
5. Bypass TPM and CPU checks to install Windows 11 update
Do not panic if you upgraded to Windows 11 from Windows 10 but are unable to install new updates because the prerequisites are not satisfied. Microsoft has provided instructions for the best Registry hacks for Windows 11 that enable you to install upgrades even on hardware that is not officially supported. The process is as follows:
- Type regedit after briefly pressing the Windows key. Open Registry Editor by clicking on it in the search results.
- Next, navigate to the path below by pasting the copied information into the Registry Editor’s address bar.
Computer\
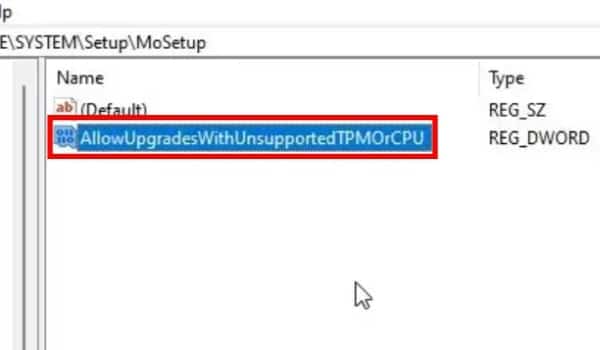
HKEY_LOCAL_MACHINE\SYSTEM\Setup\MoSetup
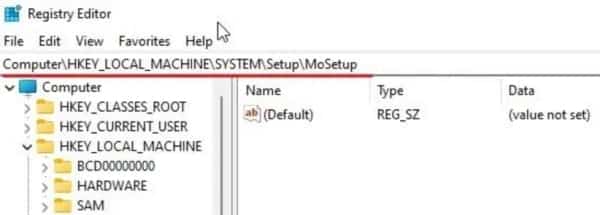
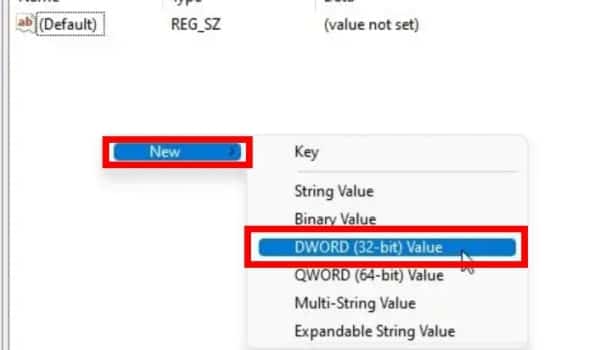
- Now, select New > DWORD (32-bit) Value from the context menu by right-clicking on the open area in the right pane.
- Next, give the file the name AllowUpgradesWithUnsupportedTPMOrCPU.
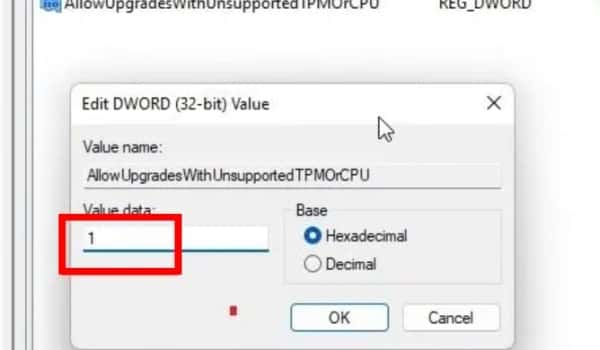
- After opening it with a double-click, update the Value data from 0 to 1. Restart your computer after closing the Registry Editor. Go ahead and update Windows 11 at this time. You won’t experience any TPM or CPU issues this time.
6. Enable or disable search highlights in Windows 11
When you start Windows Search, a new feature called Search Highlights from Microsoft will display popular searches and recent events. We must admit that we adore this feature because it keeps us informed of everything going around us. You can disable this option, though, if you prefer to keep Windows Search as minimal as possible. In Windows 11, you can enable or disable Search Highlights using the Registry Editor. You can then make the changes on whether you like the feature or not. How to do it is as follows:
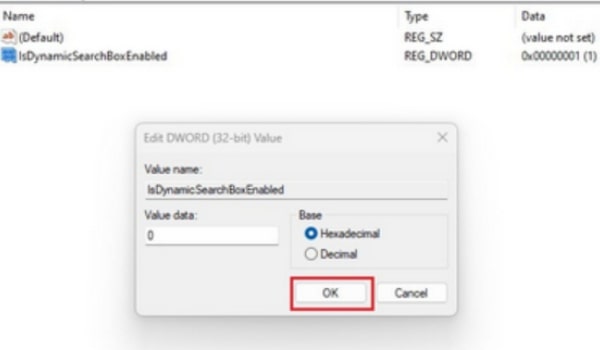
- Start the Registry Editor, then navigate to the address listed below. Open “IsDynamicSearchBoxEnabled” at this time.
Computer\HKEY_CURRENT_USER\Software\Microsoft\Windows\CurrentVersion\SearchSettings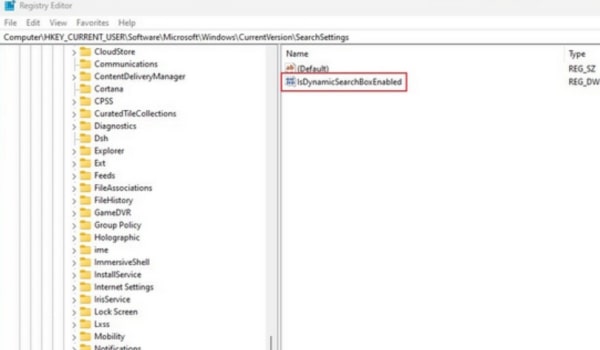
- If you want to make Windows 11’s Search Highlights inactive, here change the Value data to 0. Change the Value data to 1 if you want to activate Search Highlights.
- At this point, shut down the Registry Editor and launch Windows Explorer again through Task Manager. The Search Highlights feature in Windows 11 will either be activated or disabled depending on the modifications you have made.
7. Get the old context menu on Windows 11
One of the most desired and best Registry hacks for Windows 11 is this one, which enables you to bring back the previous context menu that we adored in Windows 10. We have already provided a thorough guide on how to use all the Registry entries to restore the previous context menu in Windows 11. As long as you follow the instructions in the guide that is given here, Windows 11 will quickly support the old Windows 10 context menu. To help you understand how it works, we’ve added a few crucial stages here.
- Start the Registry Editor, then navigate to the location below.
Computer\HKEY_CURRENT_USER\Software\Classes\CLSID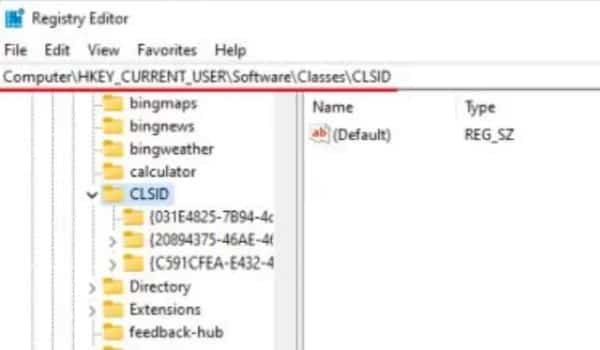
- Right-click CLSID and then on the left sidebar, add a new key. Set its name to the string that follows. Then, right-click on the aforementioned key, create a new key once more, and give it the name InprocServer32.
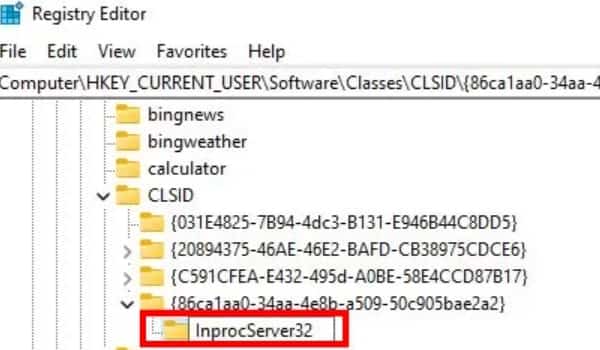
- Click OK after opening the Default file in the right pane under InprocServer32. No value needs to be entered.

Next, shut down the Registry Editor and launch the Desktop context menu. Voila! On your Windows 11 PC, you’ll discover the previous context menu has returned.
8. Stop automatic updates on Windows 11
You did read that correctly. One of the best registry hacks for Windows 11 allows you to prevent automatic updates by changing a few key values. You can disable it and feel secure if you don’t want to upgrade to significant feature changes. Here’s how to use the Registry Editor to accomplish this.
- First, launch the Registry Editor and go to the path listed below.
Computer\HKEY_LOCAL_MACHINE\SOFTWARE\Policies\Microsoft\Windows\WindowsUpdate\AU
- Right-click in the right pane to create a new DWORD (32-bit) Value and give it the name NoAutoUpdate.
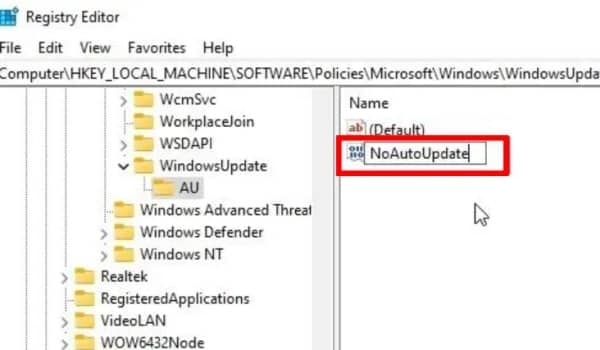
- Open NoAutoUpdate now, and set the value to 1.
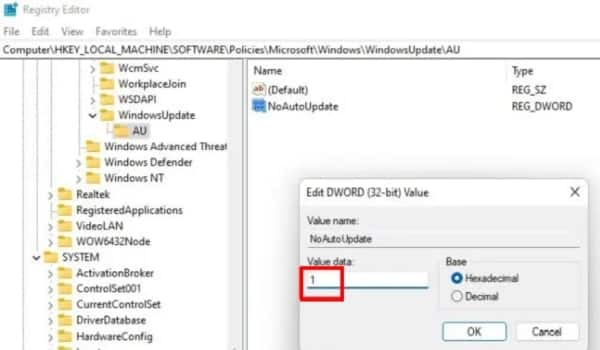
- Next, quit the Registry Editor and start your computer again. Your Windows 11 PC won’t download updates automatically going forward.
9. Customize the Windows 11 taskbar
Users who want to personalize the Windows 11 Taskbar can do so with this Registry hack. You may adjust the Taskbar’s size and position on the screen by making a few small Registry setting changes. Using the Registry Editor, you can manually update these settings even though they are not accessible through the Windows Settings page. The Taskbar on Windows 11 can be easily customized by following the tutorial in our linked article. Here, we’ve shown you how to resize the Taskbar using the Registry Editor.
- Launch the Registry Editor and go to the following.
Computer\HKEY_CURRENT_USER\Software\Microsoft\Windows\CurrentVersion\Explorer\Advanced
- Next, right-click in the open area of the right pane, select New > DWORD (32-bit) Value, and give the new value the name TaskbarSi.

- Next, open TaskbarSi and modify the value data by the guidelines below. When finished, click OK to leave the Registry Editor open.
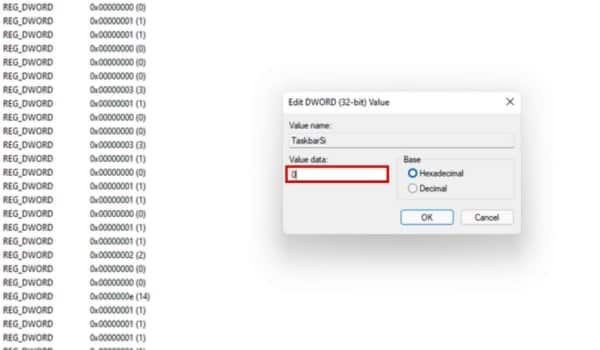
- Small taskbar – TaskbarSi value 0
- Default taskbar – TaskbarSi value 1
- Large taskbar – TaskbarSi value 2
- The updated Taskbar adjustments will now be visible when restarting Windows Explorer via the Task Manager.
10. Disable Microsoft Defender on Windows 11
By using a third-party antivirus product for Windows, you can permanently disable Microsoft Defender on Windows 11 by using the Registry Editor. Microsoft Defender on Windows 11 may be disabled using this clever registry hack, and all changes will remain in place even after an upgrade. Microsoft does not override the policies, either. The steps are as follows.
- Launch the Registry Editor and enter the address shown below. Create a new DWORD (32-bit) Value by performing a right-click on “Windows Defender” in this area.
Computer\HKEY_LOCAL_MACHINE\SOFTWARE\Policies\Microsoft\Windows Defender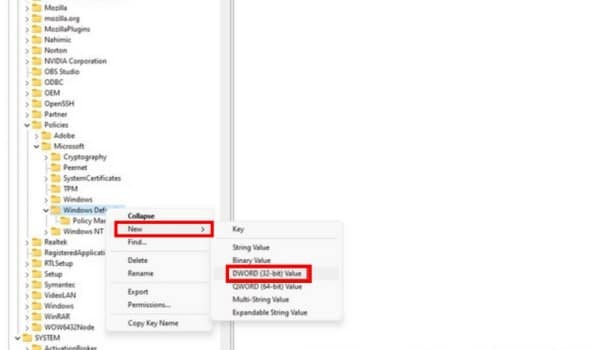
- After that, open it with the name DisableAntiSpyware. Change the value data to 1 and then select OK.
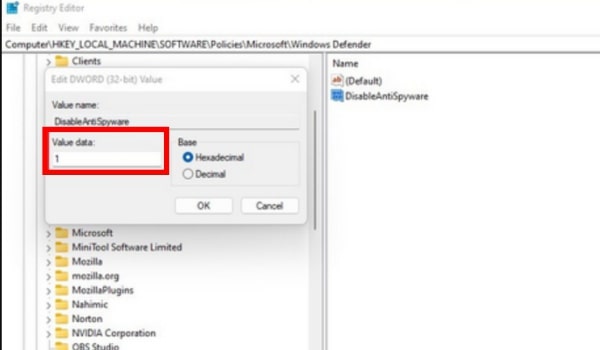
- To completely disable Microsoft Defender, you must make four additional changes of this nature.
BONUS Registry Hack: Disable Cortana On Windows 11
You may completely stop Cortana in Windows 11 using the registry hack if you don’t find it useful. We always turn off Cortana and similar native programs to make Windows 11 PC run faster. You may permanently prevent Cortana from performing its services in the background by using this registry hack for Windows 11.
- Launch the Registry Editor and go to the path listed below. Right-click this area and select Create New DWORD (32-bit) Value.
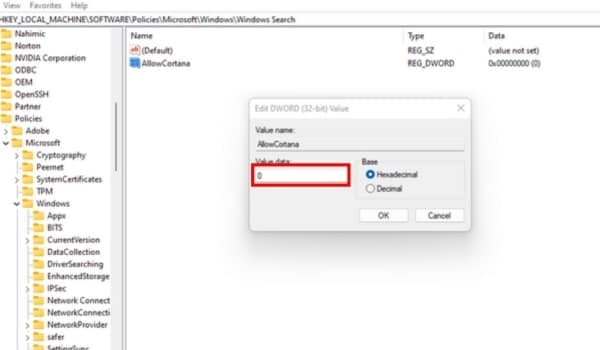
Computer\HKEY_LOCAL_MACHINE\SOFTWARE\Policies\Microsoft\Windows\Windows Search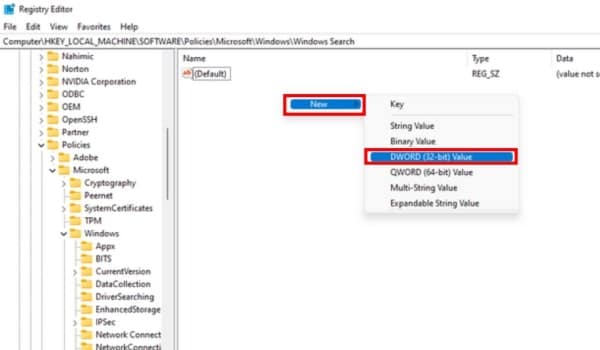
- Now, change the name to AllowCortana. Change the value data to 0 and press OK.
- Finally, quit the Registry Editor and start your computer again. Your Windows 11 PC will now be devoid of Cortana.