
In this article, we will tell you the methods on how to clear memory on Windows 11. Many caches are stored on your secondary storage by the Windows operating system. Even though the number of cached files and temporary files is normally small. But when added together; they can take up a significant amount of space on your hard drive.
Methods To Clear Memory On Windows 11
For the uninitiated; a cache is a collection of temporary data stored on your computer to allow you to access your most frequently used apps and websites faster. These files collect over time as you use your computer, so it’s a good idea to delete them now and again.
There are several types of caches on your Windows 11 that you must clear in order to clear memory. This includes RAM cache, location cache, browser cache, Microsoft Store cache, and DNS cache. Because each of these caches takes a different technique to clear, we’ll list them all below for your convenience.
Moreover, you may utilize Storage Sense to periodically clear memory on Windows 11, taking this burden off your shoulders. However, before you go ahead and delete all of your temporary files. It’s a good idea to familiarise yourself with them.
Temporary Files On Your System Are Categorized
Because there are so many different sorts of temporary files that eat up your hard drive space. It’s critical that you know what they are and how they work. So that you can make an informed decision about what to delete and what to keep. And then use the information to clear memory on Windows 11.
- Temporary Files: These files are created when you use apps on your computer. These files are saved to make the app start faster and give a better user experience. These files are absolutely safe to delete and will have no effect on the data on your account.
- Temporary Internet Files: These cache files are typically cookies that include; but are not limited to, your website preferences, advertising tracking identification, and website data that aids in the fast loading of regularly visited websites. This category, like temporary files, is safe to delete, although it may slow down the loading speed of some websites.
- Delivery Optimization Files: These files are stored in a dedicated cache and are used to download the latest upgrades from the Microsoft server, then push them to all locally available Windows devices from a master PC to save cellular data and bandwidth. You can safely delete files in this category if you do not intend to use this feature or if you do not have more than one Windows device.
- Temporary Windows Installation Files: These are just installation files that were utilized during the setup of your device’s operating system. These files are no longer needed and can be removed from your system without causing any problems. So that you can clear memory on Windows 11.
- File(s) from a previous Windows installation: These files are from a previous Windows installation on your device. If you’ve updated from one version of Windows to another, this category will appear. These files, which can be found on your Windows installer drive, contain data that may clash during installation. As a result, these files can be safely deleted from your computer.
- Windows Error Reports & Diagnostics Files: These files are created from all of the faults you encounter while using the system. And they are then transmitted to Microsoft to help improve the operating system’s reliability and discover flaws. Because these are merely text files, they will usually be little in size. However, if the files are large enough and your machine is running out of memory. Then you can remove them in order to clear memory on Windows 11.
- Microsoft Defender Antivirus: As the name implies, these are Microsoft Defender Antivirus support files. Nevertheless, you can delete these files safely from your system as they will not affect the Defender’s performance or risk your PC’s security.
- Thumbnails: These files speed up the loading of thumbnails for all of your system’s apps, files, and folders. It should typically have a small storage footprint; however, if the files are taking up a lot of space; you can safely delete them because Windows will build fresh thumbnails for the objects currently on your machine and this will help you to clear memory on Windows 11.
- DirectX Shader Cache: These files are used to speed up and improve the responsiveness of graphics-intensive apps. They, like thumbnails, should only take up a little amount of storage space. If the files are large enough; you can remove them without affecting your computer because they will be recreated as needed.
1. Clean Up Your System’s Disks
Disk Cleanup is a built-in Windows utility that assists you in removing unwanted files from your computer. Despite the fact that the tool has been in the operating system for a long time; Microsoft just modified the way to access it in the most recent version of Windows.
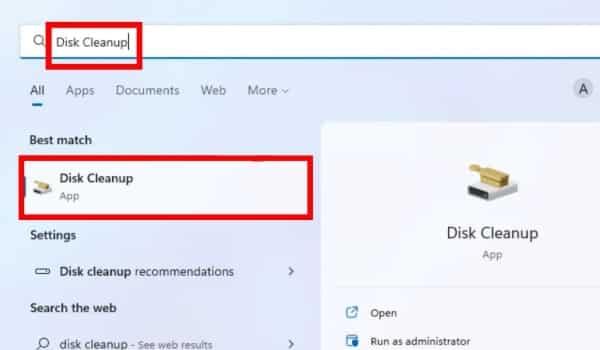
- To use the Disk Cleanup on your device; go to the Start Menu and search for it by typing Disk Cleanup. Then, from the search results, select the Disk Cleanup tile to launch the app.
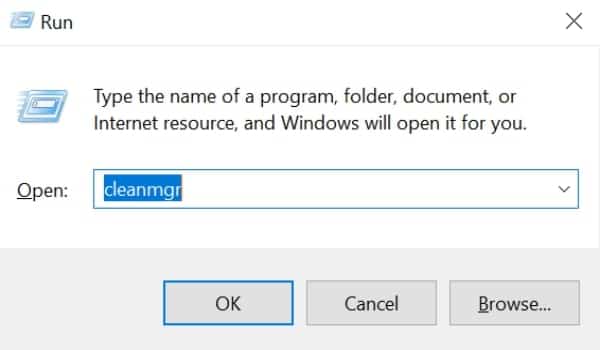
- Alternatively, you can use the Run utility to start the Disk Cleanup tool. To do so, hit the Windows + R keys on your keyboard at the same time to open the Run utility. Then, in the text box, type cleanmgr and press Enter to launch Disk Cleanup.
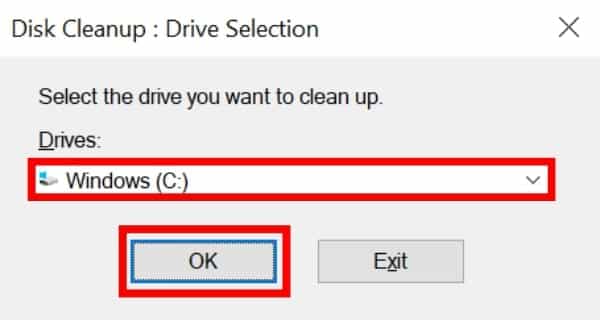
- On the Disk Clean up wizard window, select the drop-down menu to see a list of all storage drives. Then, choose one of the drives on which you want to execute the Disk Cleanup to clear memory on Windows 11. After that, click the OK button to allow Windows to calculate all of the files that can be deleted.
- A new disk cleanup window will appear on your screen once the computation is complete. Some file categories will be selected by default; you can now scroll the list to see all of the files that can be cleaned up and choose an individual category by clicking the checkbox next to each category.
- The Disk Cleanup wizard will also show you how much disk space each file category takes up on the screen. You’ll also be informed of the overall amount of space you’ll be freeing up by eliminating the files when you select numerous categories.
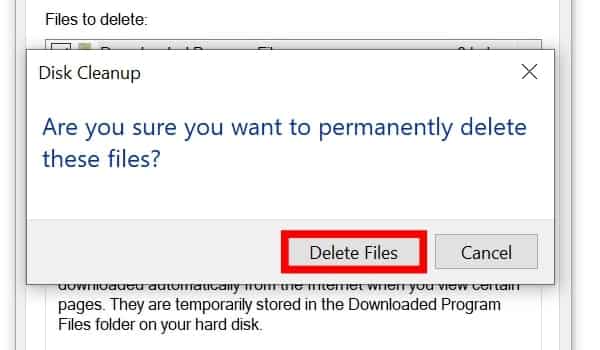
- To continue, click the OK button after you’ve chosen your desired category of files to delete in order to clear memory on Windows 11. An overlay prompt will appear on your screen as a result.
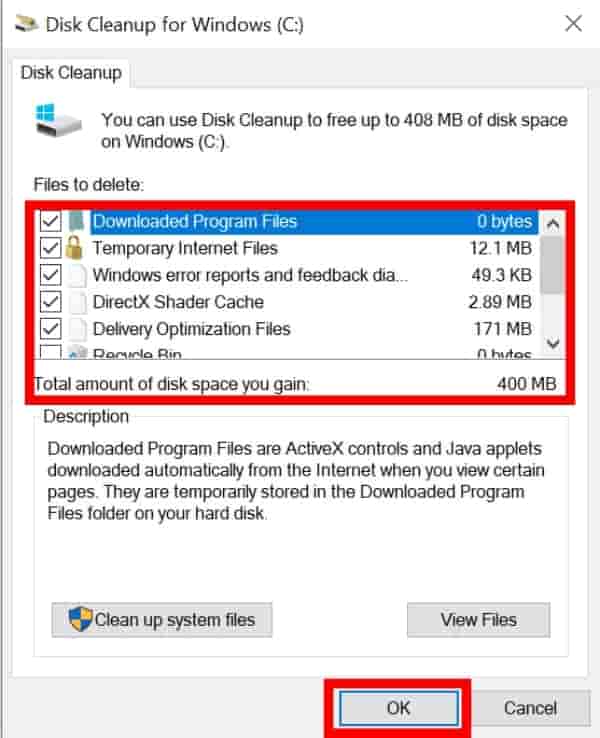
- After that, click the Delete Files option to delete all of the files in the selected categories from your computer.
That’s it, utilizing the Disk Cleanup, you’ve effectively deleted all the unwanted files from your system.
2. Uninstall Optional Features
Many optional features in Windows 11 can be downloaded and installed for a limited time or as a one-time requirement. Because they are downloaded and installed distinctly on your computer; they take up space that you can reclaim if you are no longer using them. Furthermore, the procedure is simple and straightforward; and you have the option of having them installed again if you ever require them.
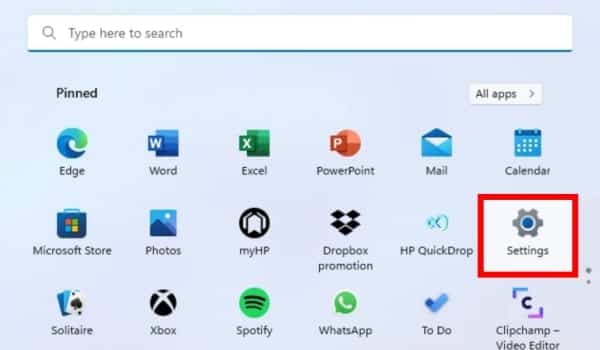
- To do so, go to the Start Option and select the Settings icon tile menu under the Pinned apps area to proceed. If it doesn’t work, search Settings in the search box to look for it. Alternatively, you can open the app on your device by pressing the Windows + I keys simultaneously on your keyboard.
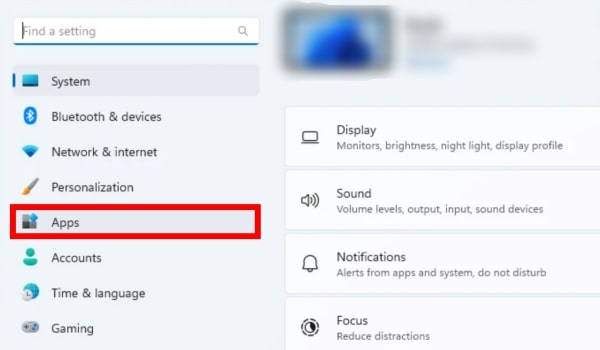
- To continue, go to the Settings window and click the Apps tab on the left sidebar.
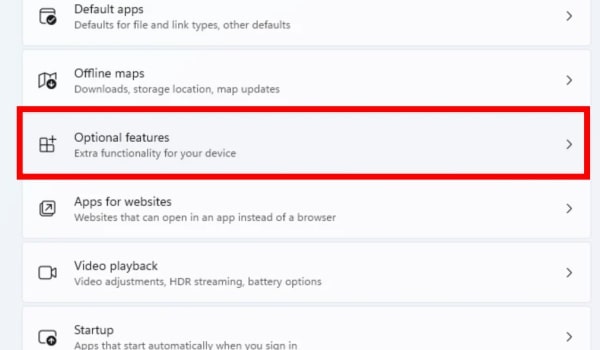
- Now, locate and click the Optional features tile in the right portion of the window.
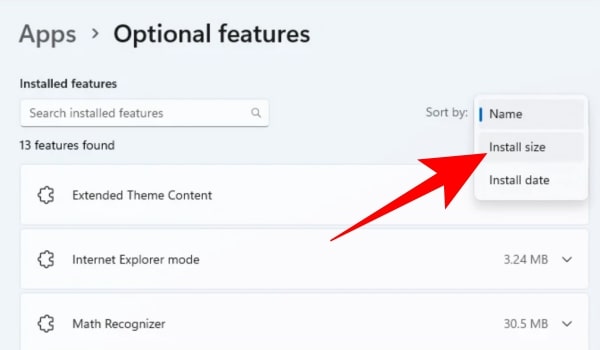
- The whole list of optional features that have been added to the device will now appear on the next screen. Then, under the Installed features section; click the drop-down menu followed by the Sort by option to expose an overflow menu, and select the Install size option to sort the list in descending order of size.
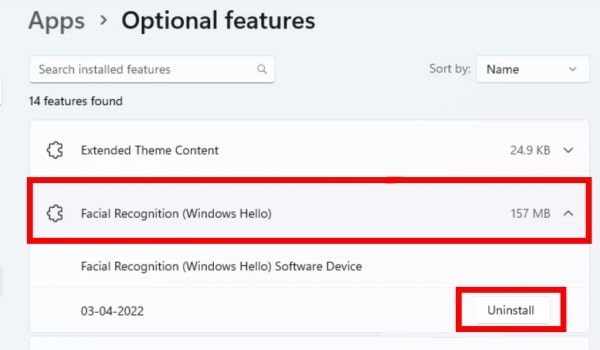
- Then look over the list and determine which optional features you want to get rid of. Once you’ve made your decision; expand the individual optional feature tile and then uninstall the feature by clicking the Uninstall button in the bottom right corner of the tile.
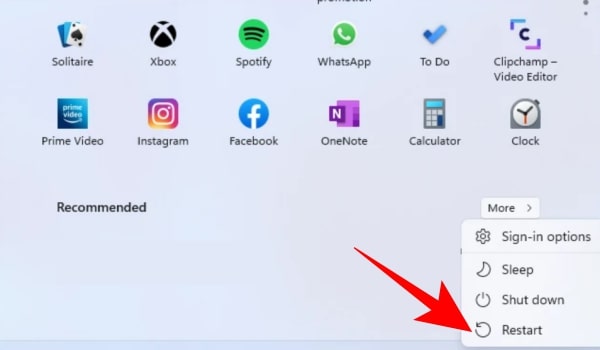
- After you’ve deleted the feature, you may be prompted to restart your computer; choose Restart now to restart your computer right away. Otherwise, select Restart later to restart the device whenever it is convenient for you.
If you want to delete more than one optional feature. Then, follow the procedure above to remove them all from your system and clear memory on Windows 11.
3. Use Clean Up Recommendations To Free Up Space
As previously stated, Disk Cleanup has been a part of Windows for a long time. Thus the user experience feels a little outdated and out of place for users who have recently switched to the Windows platform. As a result, consumers can use the Cleanup advice to clear memory providing a lot better experience as well as greater convenience.
- Go to the Start Menu and select the Settings tile from the Pinned apps section to continue. Otherwise, search for it in the search box by typing Settings. Alternatively, you can use your keyboard to press the Windows + I keys together.
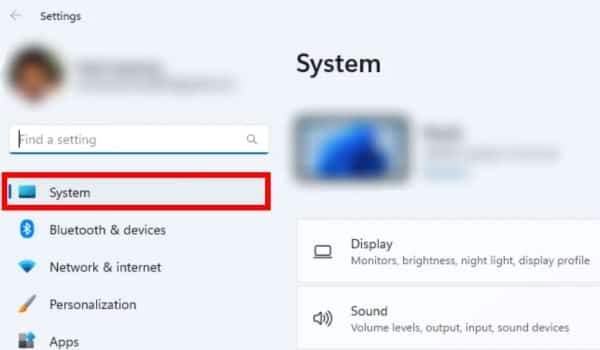
- To proceed, make sure you’ve selected the System tab from the left sidebar of the Settings window.
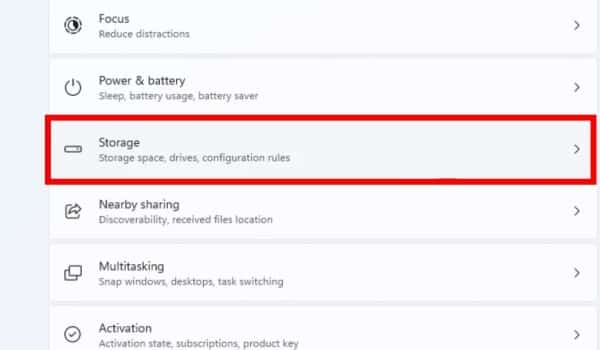
- Now, scroll down to the right part of the window and click on the Storage tile.
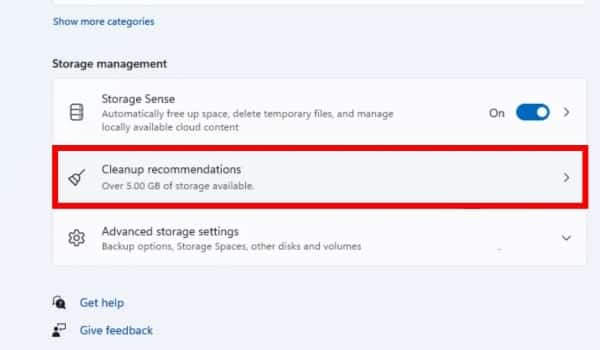
- Then, from the Storage settings page, scroll down to the Cleanup recommendations tile; which is located under the Storage Management portion of the page, and click it to proceed.
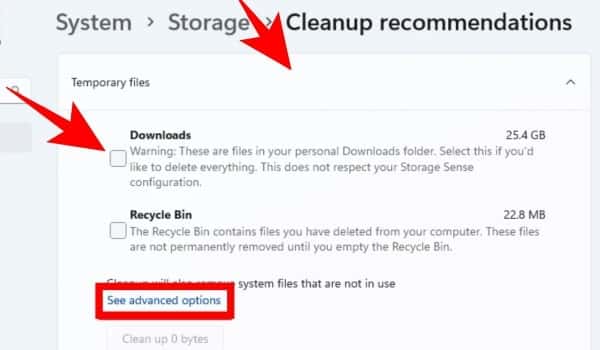
- To enlarge the Temporary files area on the Cleanup recommendations screen, first, click on the Temporary files tile. Then, using the checkboxes next to each entry, select the file categories you want to see. Click the See advanced options button if you want to pick more categories of temporary files. After you’ve chosen your preferred categories. Now, click the Clean up button at the bottom of the page to delete selected files.
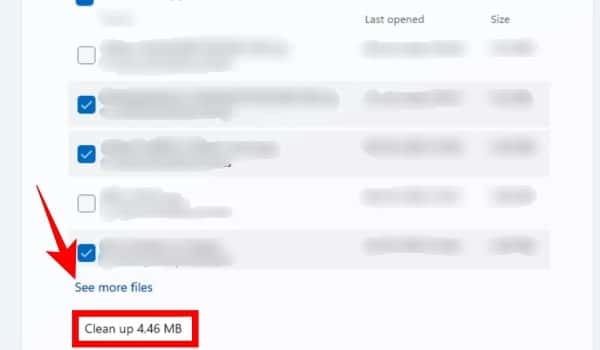
- To enlarge the section, click on the Large & unused files tile. This part will list all of your unused and very huge files. Examine each folder and select one by checking the box next to each list item.
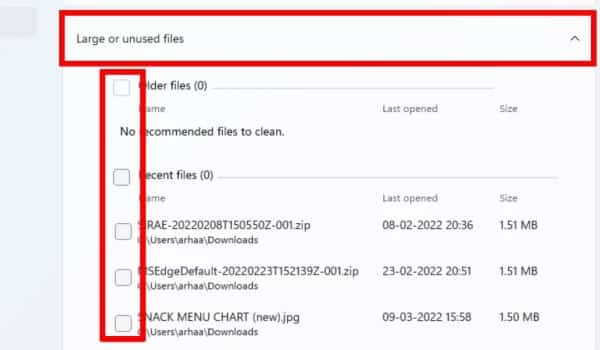
- Now, click the See More files option to broaden the list of files that you can delete to clear up space on your computer. After you’ve picked the necessary files, click the Clean up option to remove them from your system permanently.
- Then, to enlarge the section, click on the Unused apps tile. If any app appears in the list, pick them by checking the box next to each item; and then click the Clean up option to delete the programs and their data from your system.
4. Rebuild The Search Database And Tweak The Search Index To Free Up Space
Excluding non-essential directories and rebuilding the search database can considerably improve the storage situation on your device if you have a lot of files on your PC.
- To do so, first, go to the Start Menu and then click on the Settings icon tile under the Pinned apps section. If it doesn’t work, search Settings in the search box to look for it. Alternatively, you may open the program by pressing the Windows+I keys simultaneously on your keyboard.
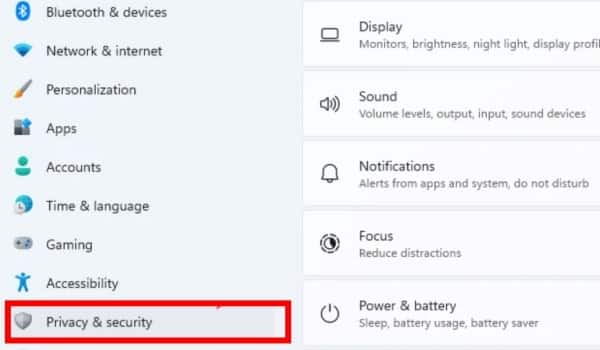
- Then, from the left sidebar of the Settings window, select the Privacy & Security tab to continue.
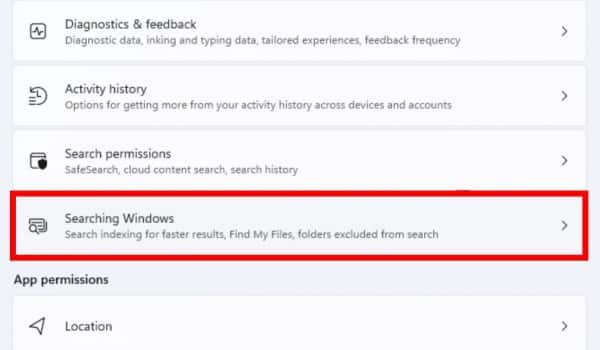
- After that, go down to the right area of the page and click on the Searching Windows tile to continue.
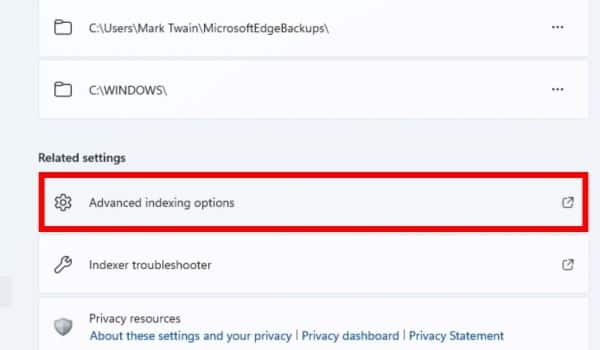
- Now, locate and click the Advanced indexing options tile under the Related settings section on the Searching Windows page. This will open a new window on your computer screen.
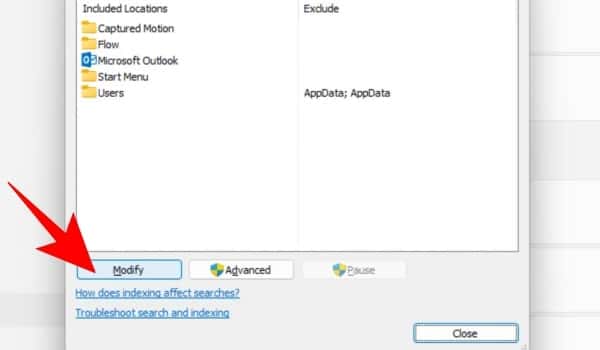
- To proceed, click the Modify button in the lower left corner of the Indexing Options window.
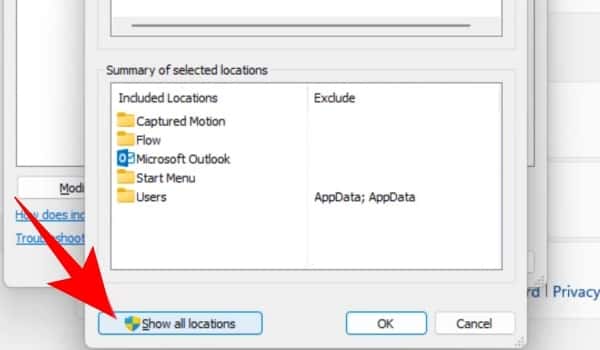
- After that, go ahead and click the Show all locations option in the bottom left corner of the newly opened window.
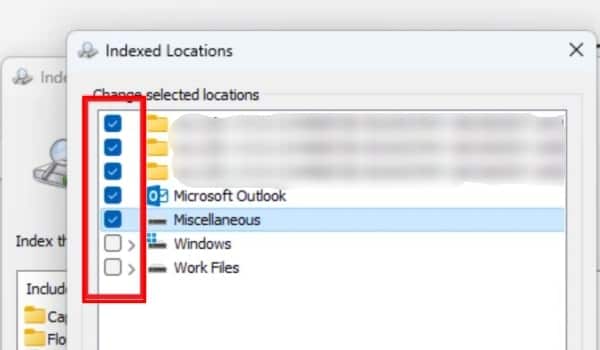
- Then, under the Change selected location section, uncheck each listing item by clicking on the checkbox before it. Keep in mind that the location you deselect will no longer be searchable from the Start Menu; you’ll have to manually navigate to the directory to find the files.
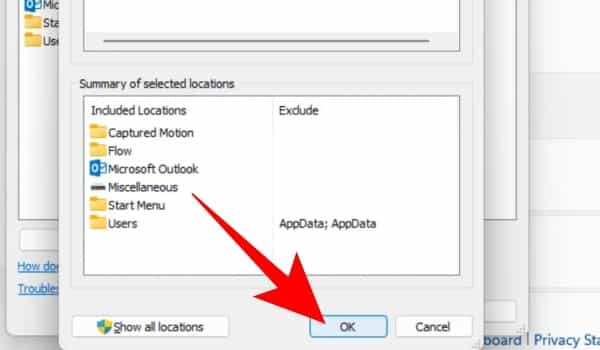
- To apply and close the window, click the OK button once you’ve made your selection.
- To continue, click the Advanced button in the lower right corner of the Indexing Options window. This will open a new window on your computer screen.
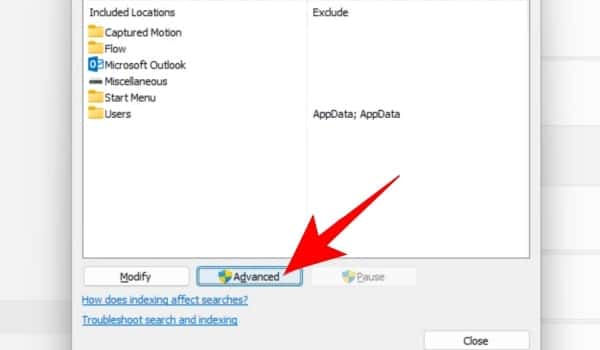
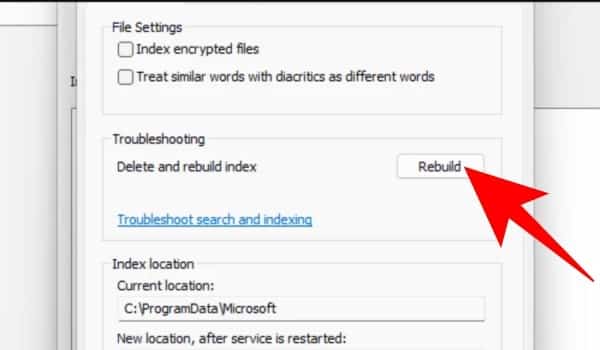
- Locate the Troubleshooting section in the newly displayed window and click the Rebuild button under it to rebuild the search index on the device. This will help you to clear memory on Windows 11.
5. Delete All Files From The Temporary Files Folder
Except for the ‘Temp’ folder in your Windows installer drive; Disk Cleanup and Cleanup Recommendation are very efficient ways to clean up practically all of the temporary files existing on the system. As you use your computer, the files in this directory build over time. However, you can safely delete these files because they will be re-generated as needed.
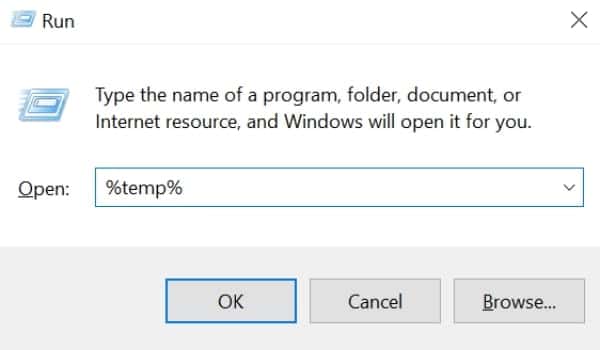
- To empty the temporary folder on your device, press Windows + R on your keyboard at the same time to bring up the Run command utility on your screen. Then, to continue, type %temp% and press Enter or click the OK button. A separate File Explorer window will appear on the screen as a result of this action.
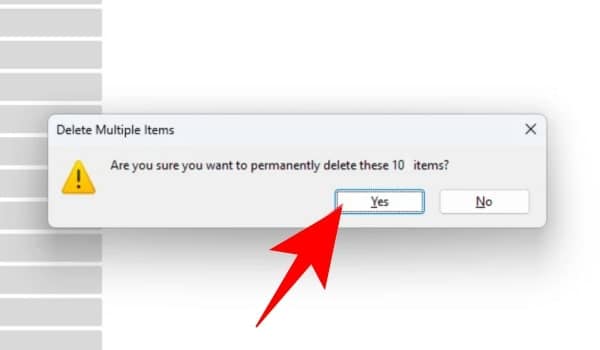
- After that, use the Ctrl + A keys on your keyboard to select all the files in the Temp folder directory, and then press the Shift + Delete keys on your keyboard to delete all the selected files. You will be prompted for confirmation of the activity on your screen; click the Yes button to begin deleting all files.
- It’s possible that you’ll see a message claiming that some files can’t be removed because they’re in use, but that’s fine because they could be used by background services or apps. Tick the box next to Do this for all current items and then click the Skip button.
6. Use Storage Sense To Automatically Clean Up Memory
Activating Storage Sense on your Windows 11 PC could prove to be a very wise move if you don’t want to do manual labor every time you want to clear memory from Windows 11 to preserve your PC’s optimal performance.
Storage Sense cleans up your storage disks automatically when your PC runs out of space; and it may also clean up transient system files and program data. You can also schedule Storage Sense to operate on your Windows 11 PC on a regular basis. However, before you can establish a schedule on your device, you must first enable it.
- To enable Storage Sense, go to the Start Menu and select the Settings tile from the Pinned apps section.
- Then, in the Settings window, make sure the System option is chosen on the left sidebar of the window to continue.
- Now, locate and click the Storage tile in the right portion of the window.
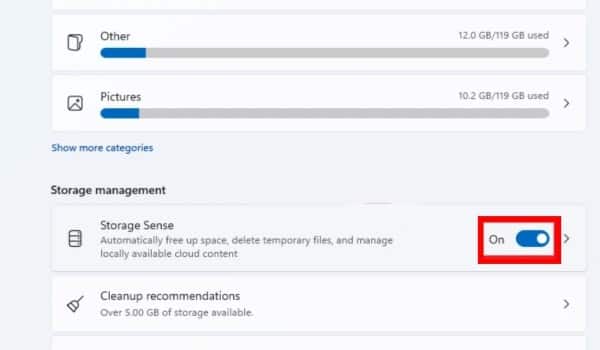
- Locate the Storage management area on the next screen and toggle ON the switch located on the far right edge of the tile.
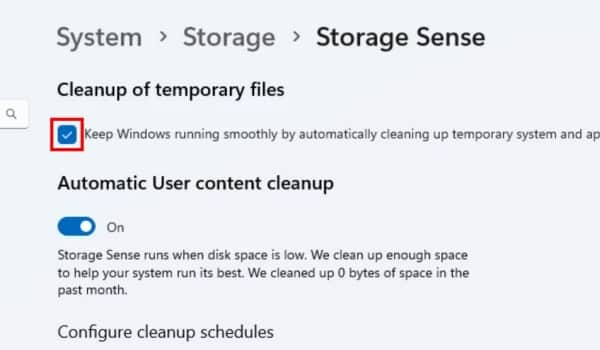
- Then, on the following screen; tick the box next to the single option under the Cleanup of temporary files section to automatically clean up temporary system and app files.
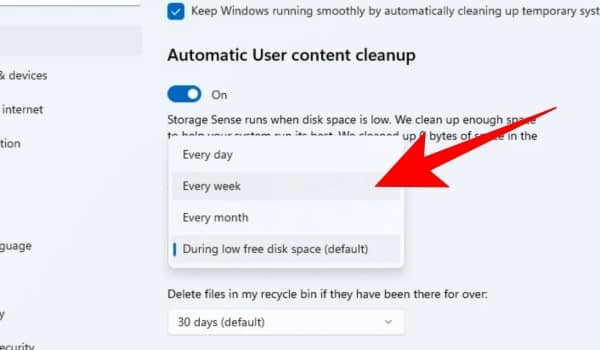
- Next, go to the Configure cleanup schedules section to set a periodic routine for Storage Sense. Then, under the Run Storage Sense option, click the drop-down menu. After that, select a preferred frequency by clicking. If you’re continuously saving large amounts of data and running out of storage memory; the Weekly frequency is recommended.
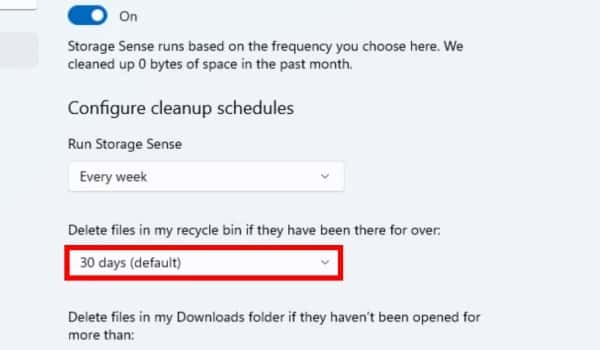
- Next, select a period of days to permanently erase your data from the system from the drop-down menu accessible under the Delete my files in recycle bin if they have been there for over option.
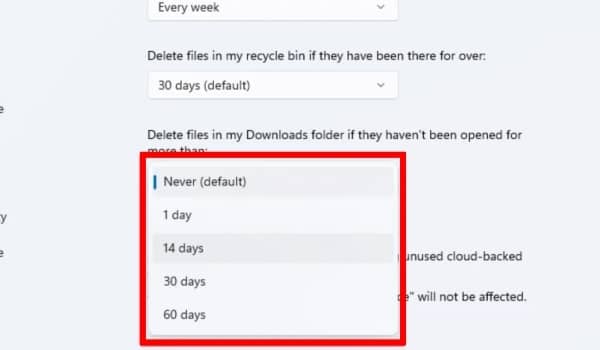
- Now, choose the drop-down menu under the Delete files in my Downloads folder if they haven’t been opened for more than option to delete files in your Downloads folder that you haven’t opened in a long time. Then, on the next screen, select the number of days you want to keep the downloaded files.
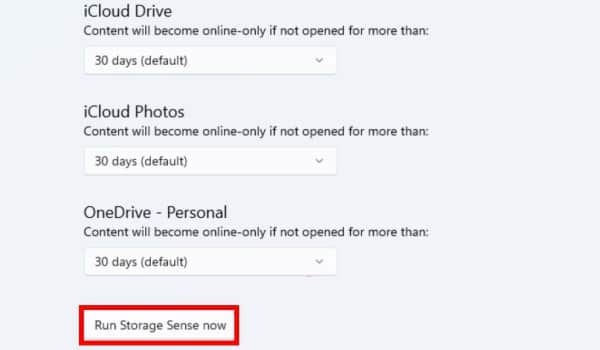
- Once you’ve customized the parameters to your liking; click the Run Storage Sense now button at the bottom of the page to launch the wizard and allow Storage Sense to clear memory on Windows 11.
7. Delete The Cache In Your Browser
The browser gathers items such as thumbnails, icons, photos, and time codes over time when you visit websites, allowing for a fast browsing experience. Cleaning the cache in your browser is generally not a good idea. However, if you’re running out of space or having trouble loading certain websites recently and need to clear memory on Windows 11; emptying the cache is one of the most efficient ways to solve your problems. We’ll show you how to clean cache in all of the major browsers for your convenience.
Clear Microsoft Edge‘s Cache
Once you get the hang of it, clearing cache from your device’s default browser is a pretty simple and painless process. In reality, all it takes is a few mouse clicks on your part to complete the process.
- To do so, go to the Start Menu and click on the Edge icon tile under the Pinned apps area to proceed. Otherwise, search for it in the menu by typing Edge.
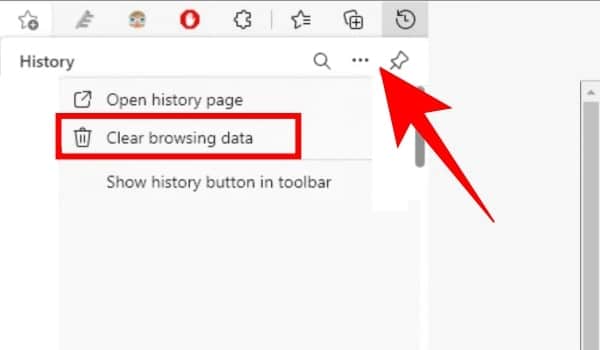
- Then, on your keyboard; hit the Ctrl + H keys simultaneously in the Edge window or click the ellipsis icon in the top right corner of the flyout menu; then select the Clear browsing data option from the overflow menu. In Microsoft Edge, this will start a new tab.
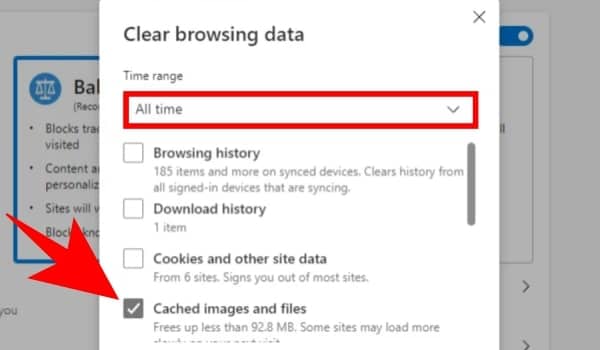
- Then, from the newly opened tab; first, click on the dropdown menu at the top of the window and select the All time option from there. Then, except for the Cached images and files option; deselect all of the alternatives by clicking on the checkbox next to each one. To delete the browser cache, click the Clear now button on the overlay window once you’ve finished.
That’s all there is to it; you’ve successfully erased the cache on Microsoft Edge.
Clearing Google Chrome’s Cache
Clearing cache in Google Chrome is similar to clearing cache in Microsoft Edge, however, it requires a few extra steps.
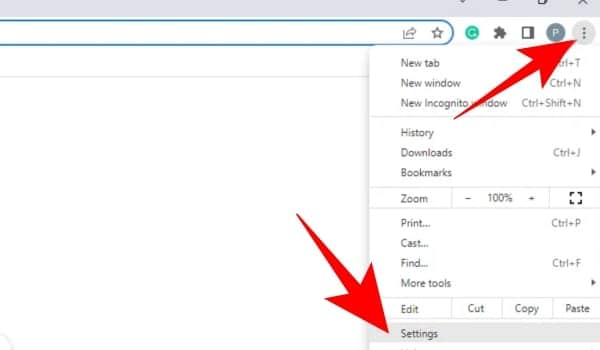
- To remove the cache from Google Chrome; go to the Start Menu and search for it by typing Chrome in the search box. Then, from the search results, open the program by clicking on the Google Chrome tile. In the Chrome window, click the Ellipsis icon in the top-right corner to expose the overflow menu. To continue, locate and click the Settings option from the menu. In the Chrome browser, this will launch a new tab.
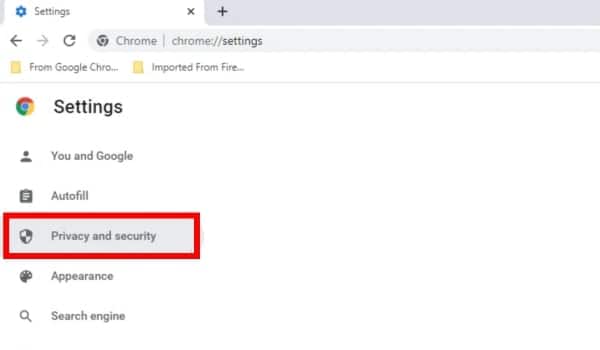
- To continue, go to the Chrome browser’s Settings tab and select the Privacy and Security tab from the left sidebar of the page.
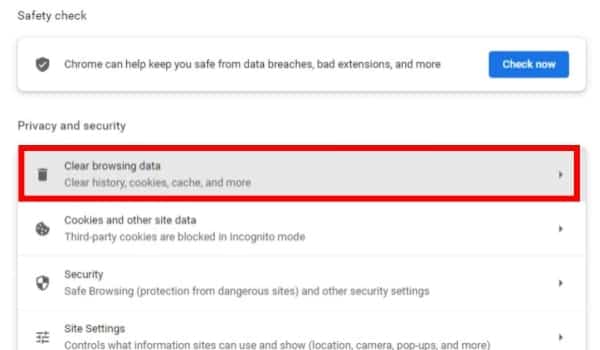
- Then, on the right side of the page, select the Clear browsing data tile to continue. An overlay window will appear on your screen as a result of this.
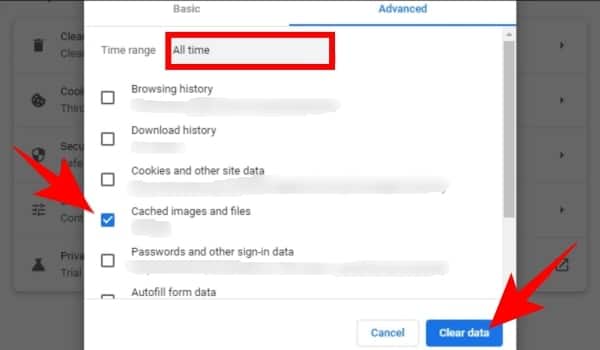
- Deselect all options except the Cached images and files option from the overlay window on your screen. When you’re finished, click the Clear Data button in the bottom right corner of the window to clear the data.
Mozilla Firefox Cache Should Be Cleared
Although there are a few extra stages and the process differs slightly from the other two browsers. It is still quite straightforward and simple to follow.
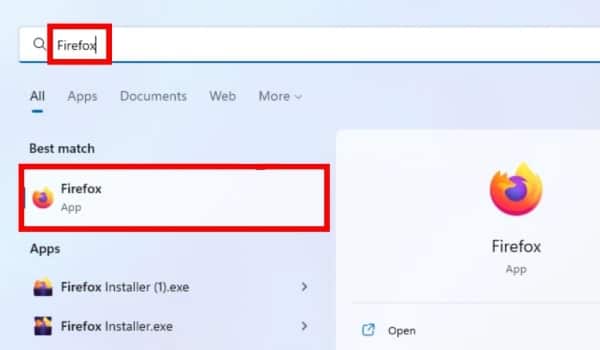
- To do so, first, go to the Start Menu and type Firefox into the search box to find it. Then, from the search results, open the app by clicking on the Firefox tile.
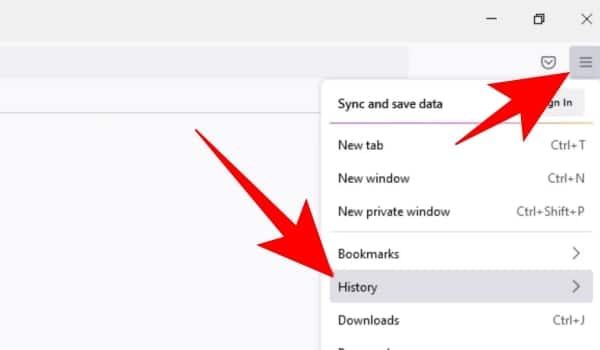
- From within the Firefox window, click on the Hamburger icon in the top right corner to reveal the overflow menu. Then, from the menu, locate and click on the History option to enlarge the section.
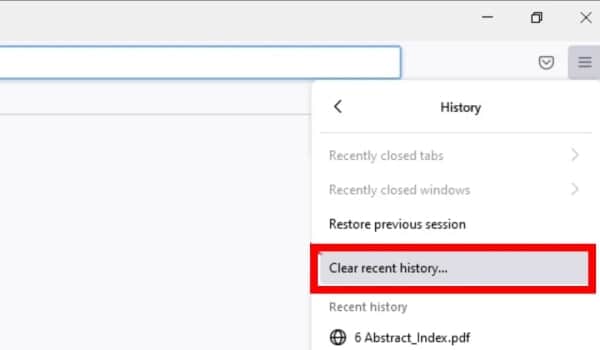
- To begin, locate and select the Clear recent history option in the expanded part of the overflow menu. An overlay window will appear on your screen as a result of this action.
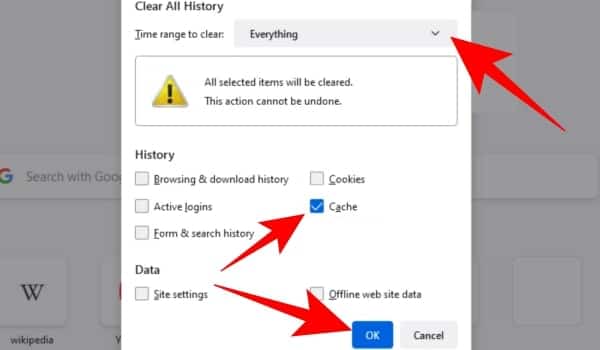
- Now, from the overlay window, first, select the Everything option from the dropdown menu in the top column. Then, before selecting the Cache option, tick the box next to it. If necessary, deselect any other item by clicking on the checkbox next to the listing. Finally, click the OK button to remove all of Mozilla Firefox’s cache.
8. Delete Unused Languages
Multiple languages are supported by Windows 11, but they take up additional storage on your computer. As a result, eliminating them if you don’t use them often would be a sensible move to reclaim your storage space.
- To do so, first, go to the Start Menu. Now, click on the Settings icon tile under the Pinned apps section. Alternatively, you may open the program by pressing the Windows + I keys simultaneously on your keyboard.
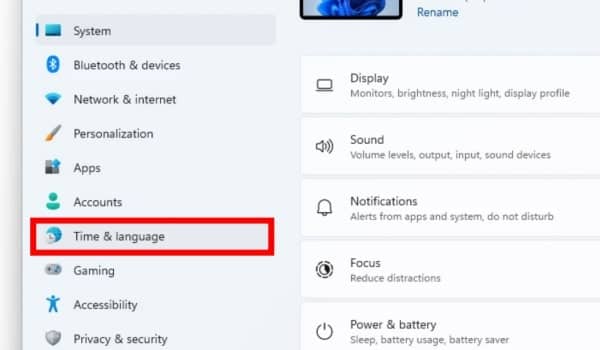
- Now, click on the Time & language tab on the left sidebar of the window.
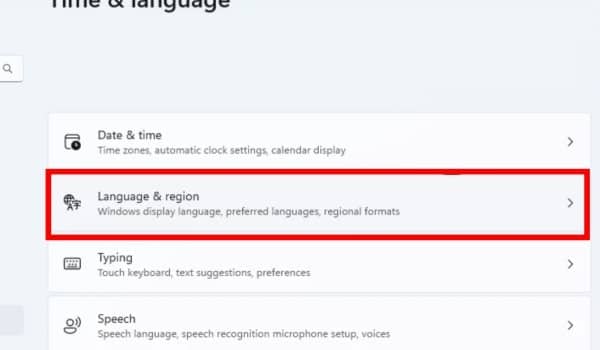
- To continue, click on the Language & region tile on the right section of the window.
- Then, on the following screen, look under the Language area for the installed languages. Click on the ellipsis icon next to the language you want to remove. Then, in the overflow menu, select the Remove button to get rid of the language.
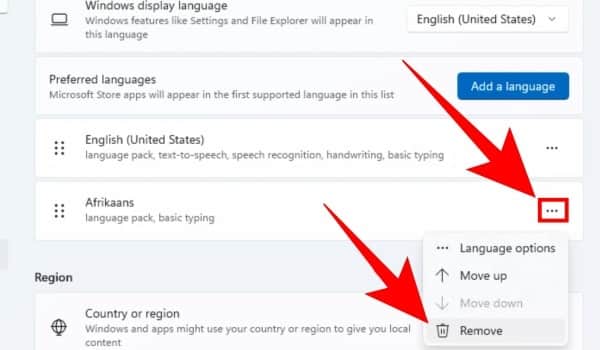
If you have more than one language installed on your computer. Then repeat the procedure above to delete the language and clear memory on Windows 11.
I was reading some of your articles on this website and
I conceive this internet site is rattling instructive!
Keep putting up.Raise blog range