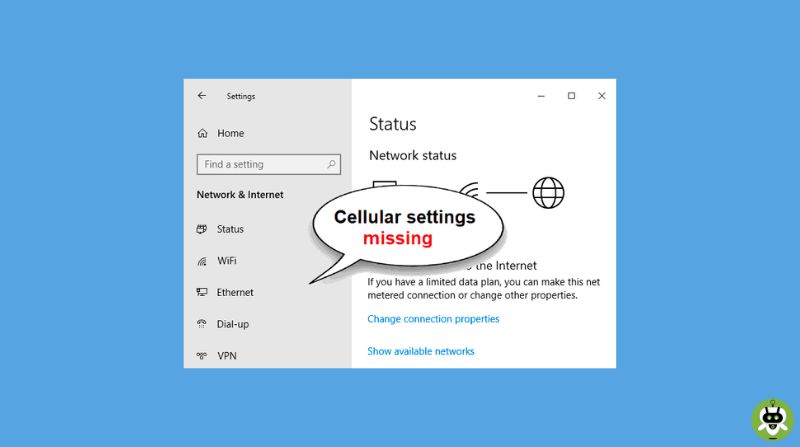
Let’s see how you can fix missing cellular option in Windows 11. As a Windows 11 user, trouble connecting to a cellular network is quite common. It is certainly frustrating to find that the option itself is missing especially when you are on the go and do not have access to a Wi-Fi network. However, there is a solution to this mess. In fact, there are several solutions of which at least one definitely has to work for you.
- How To Debloat Windows 11 To Improve Performance?
- How To Start Windows 11 In Safe Mode?
- How To Clear Memory On Windows 11?
Several reasons can contribute to the missing cellular option on your Windows 11 device such as a disabled cellular adapter, outdated or corrupted drivers, or misconfigured or corrupt settings. Depending on exactly what the reason is, you will be able to find an apt solution from the options below:
Steps to Fix Missing Cellular Option in Windows 11
1. Check if the Cellular option is enabled in the Settings of your device
Clearly, if the cellular option is disabled in the settings, you will not be able to use it. Hence, to enable the cellular option from the settings of your device, follow these simple steps:
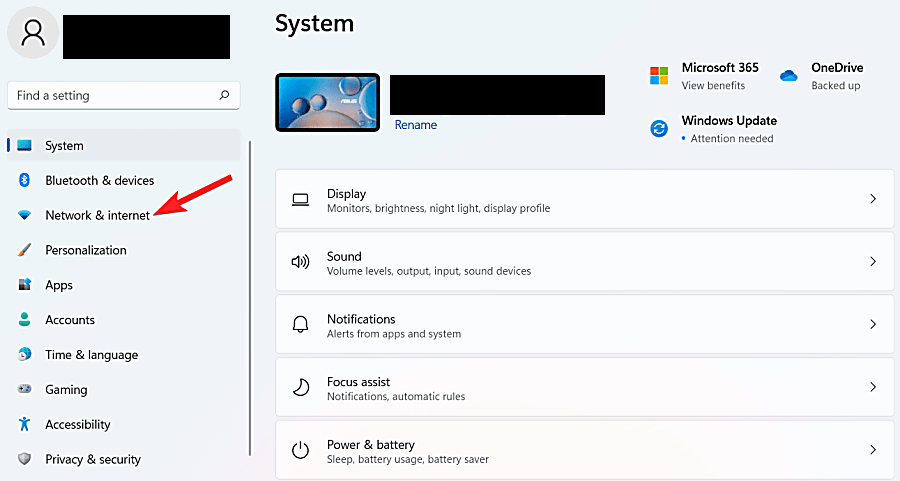
- On your home screen, right-click on the Start icon and select Settings, or use the Windows+I shortcut keys to open up the Settings menu of your device.
- In the navigation menu on the left of the screen, locate Network & Internet settings and select it.
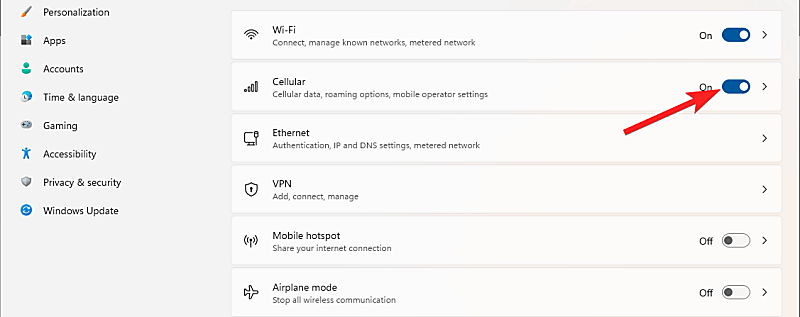
- Here, you will find the Cellular option. Toggle its switch on to enable it.
2. Use Quick Settings to enable the Cellular option
Alternatively, you can also enable the Cellular option from the Quick Settings of your device.
- On the taskbar, locate the icon of Network, Battery, or Volume to access Quick Settings.
- Simply clicking on the Cellular option here will enable it and you will then be able to view the available networks.
- Much like connecting to a Wi-Fi network, select one of the available options to join an existing network or set up a new one.
- Once you are done using a cellular network for your device, you can easily turn it off as well in the same way from Quick Settings.
3. Use the Airplane Mode Settings to enable the Cellular option
On your home screen, right-click on the Start icon and select Settings, or use the Windows+I shortcut keys to open up the Settings menu of your device.
- In the navigation menu on the left of the screen, locate Network & Internet settings and select it.
- Select the Airplane mode option to access it. Ensure not to toggle its switch on.
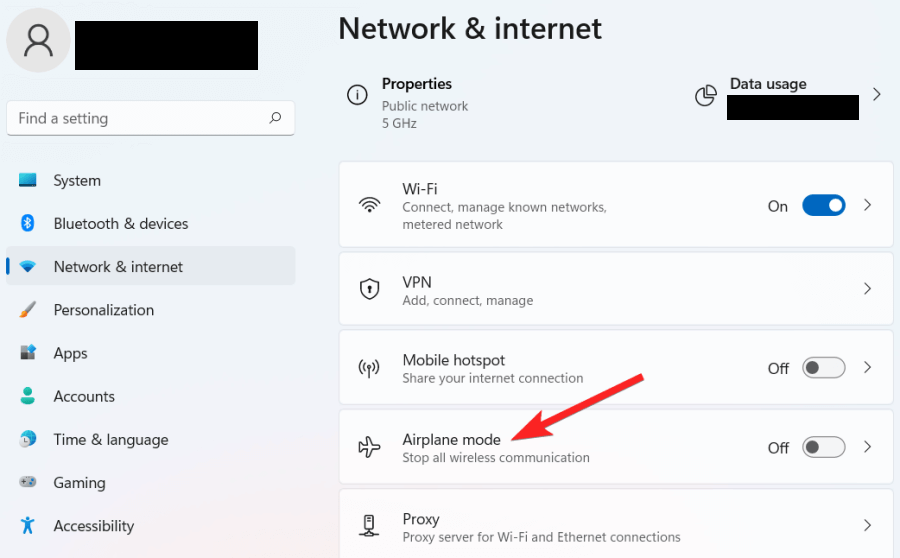
- In the section for wireless devices, you will now see the Cellular option. Toggle it on to enable it.
- To disable it, follow the same steps and toggle it off.
4. Use the Network Troubleshooter of Windows 11
If the problem persists, you can also use Windows 11’s native Network Troubleshooter to locate the source of the issue precisely. This will not only help in finding a relevant solution to the problem but will assist you through the solution as well. Follow these steps to access the Network Troubleshooter:
- On your home screen, right-click on the Start icon and select Settings, or use the Windows+I shortcut keys to open up the Settings menu of your device.
- In the navigation menu on the left of the screen, locate System Settings and select it.
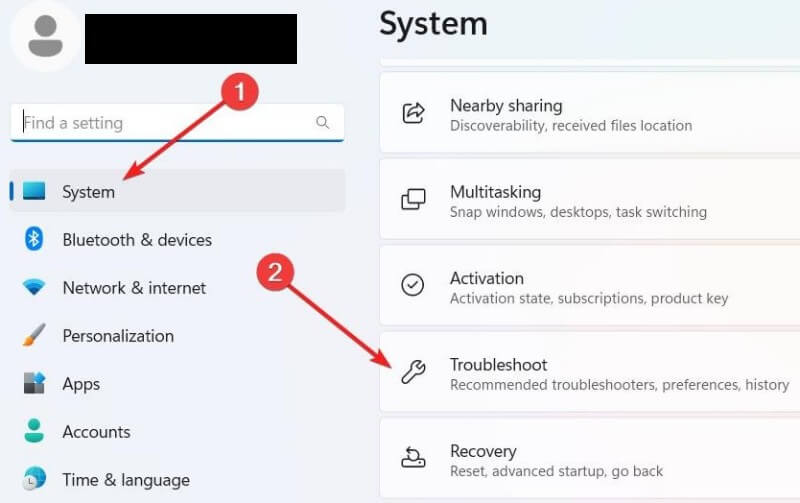
- On the right, find Troubleshoot and click on it.
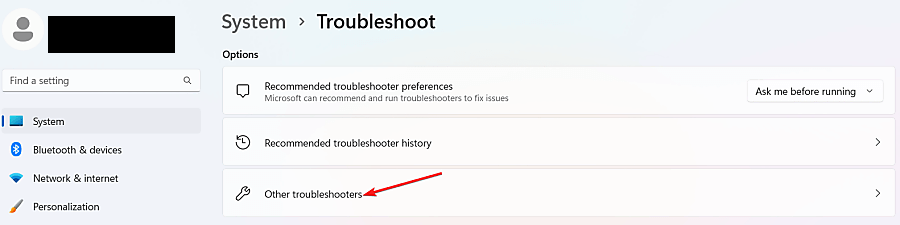
- Among the various options displayed, select Other troubleshooters.
- Find the Internet Connections option and click on its Run button to begin the process of troubleshooting.
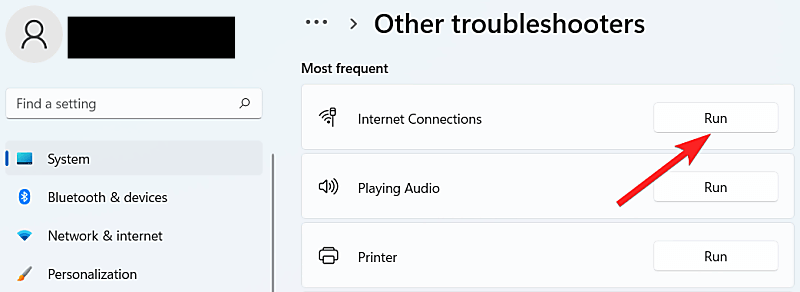
- Once the troubleshooter gets through its analysis and detects the persisting issue, it will suggest the optimal solution and even guide you through it.
5. Check the Cellular Adapter of your device
If earlier methods aren’t helping, it could be possible that the cellular adapter of your device itself is disabled. Since this is an absolute necessity while connecting to the internet using a cellular network, the cellular adapter of your device needs further confirmation of its status. To do so, follow these steps:
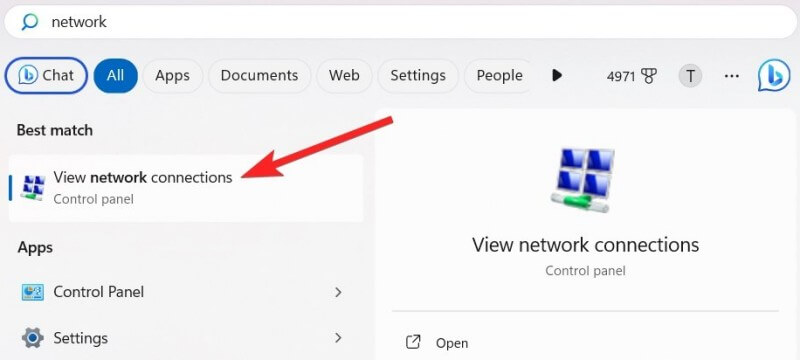
- From the home screen of your device, open the Control Panel. Look for the option to View network connections and open it. Alternatively, you can also simply click on the Windows icon and begin typing “Network” in the search bar. It will automatically give you the option to open View network connections in the Control Panel.
- Next, navigate to your cellular adapter and right-click to open its menu. Here, click Enable. In case you do not find the Enable option, it would mean that it is enabled already and you may have to keep looking for another method to fix this issue as continued below.
6. Check for updates on the Cellular Adapter Drivers
In order to check whether the cellular adapters of your device are updated, go through the following steps:
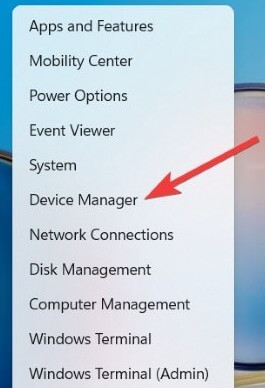
- On the home screen, right-click the Start icon and from the menu that pops up, select Device Manager.
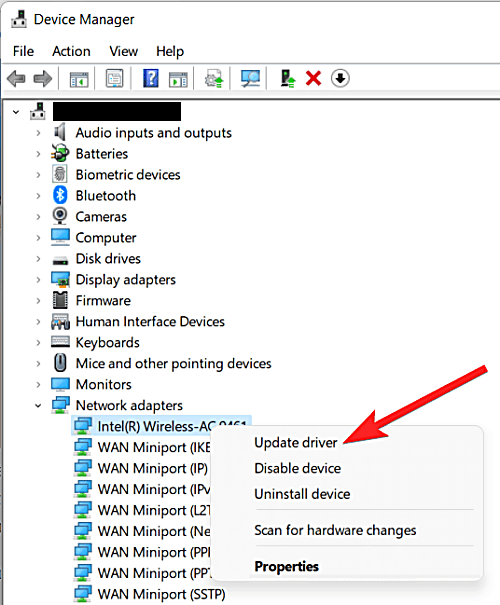
- Here, find Network adapters and expand this category.
- After expanding, right-click on the driver and select the option to Update driver.
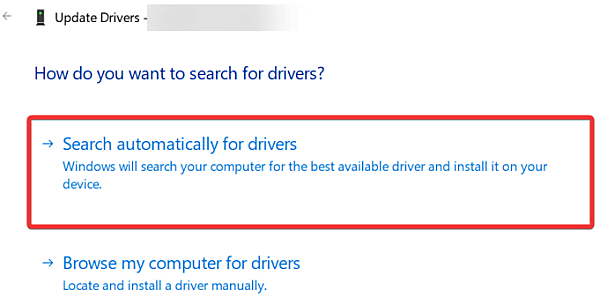
- Now select the first option to Search automatically for drivers so that you do not have to do anything manually as Windows will do the rest for you.
7. Reset Network Settings of your device
As is always the case, a reset can sometimes solve minor issues of corrupt or missing settings. Do remember that all the earlier configurations will be lost as Windows will return to its default settings after these steps.
- On your home screen, right-click on the Start icon and select Settings, or use the Windows+I shortcut keys to open up the Settings menu of your device.
- In the navigation menu on the left of the screen, locate Network & Internet settings and select it.
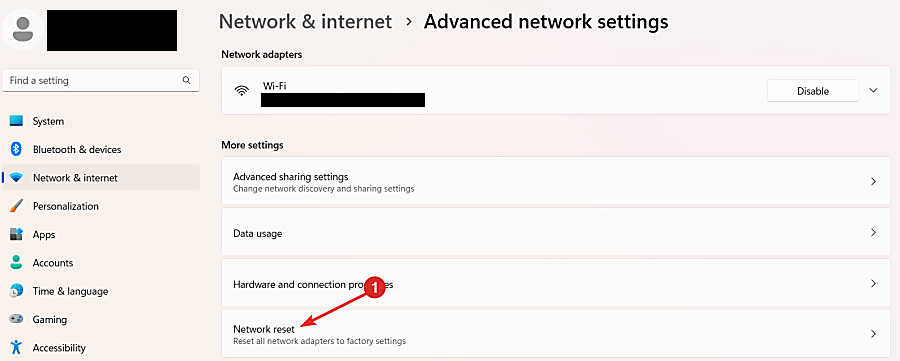
- On the right, find Advanced Network Settings and select it.

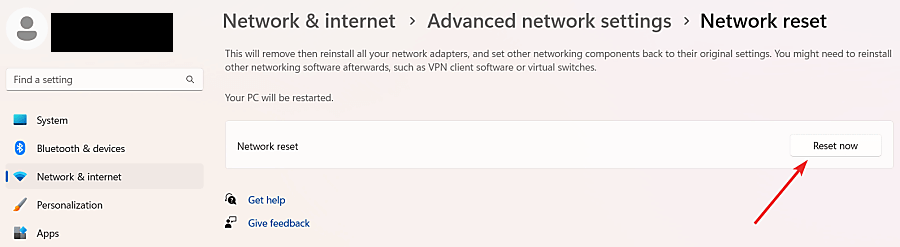
- Here, scroll to find the Network reset option and click on it.
- Click on Reset now and confirm your choice to initiate the reset to default network settings.
8. Uninstall and install the Cellular Adapter Drivers again
If you still cannot locate the cellular option on your device, you may have to uninstall the adapter drivers and reinstall them. As with a reset, a reinstall will also help in starting afresh with default settings.
- On the home screen, right-click on the Start icon, and from the menu that pops up, select Device Manager.
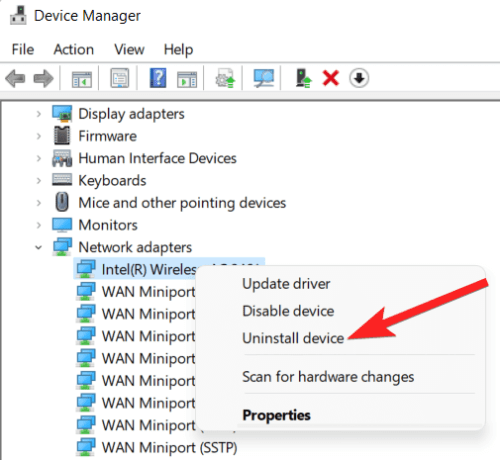
- Here, find Network adapters and expand this category.

- After expanding, right-click on the driver and select the option to Uninstall device.
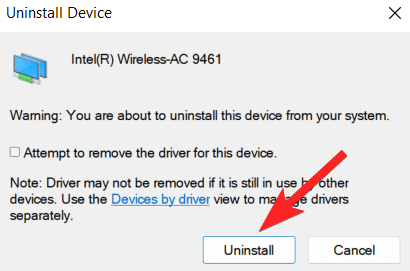
- A confirmation prompt will appear. Click the Uninstall button to confirm your choice.
- Now, locate the Check for Hardware Changes icon and click on it.
- Windows will now check for the most recent version of the driver and install it.
- Give your device a restart for these changes to take effect.
9. Clean boot your Windows device
Run a clean boot on your device to try and get away with any other pending issues by following these steps:
- On the home screen, use the shortcut keys Windows+R to bring up the Run process.
- Type in msconfig and hit OK to confirm.

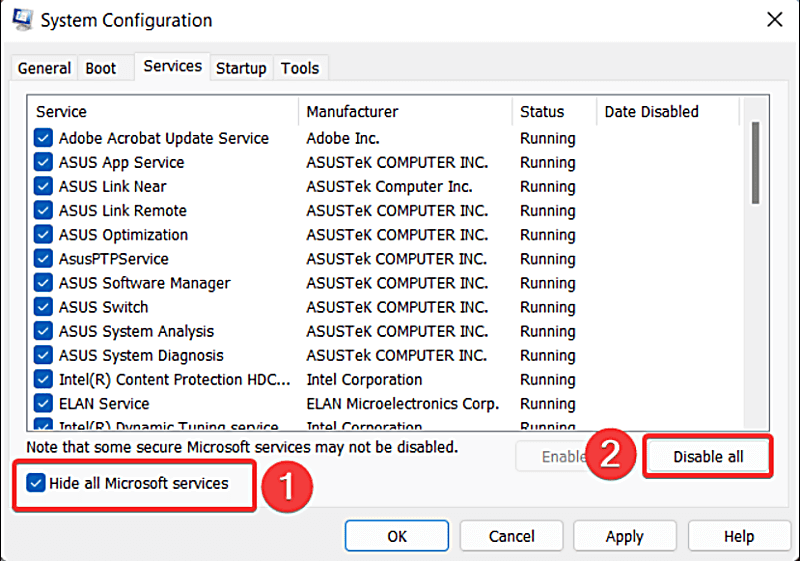
- Once the System Configuration is pulled up, head to the Services tab.
- Here, select the option to Hide all Microsoft services. Then, click on the Disable All option as well.
- Located next to the Services tab, open the Startup tab now.
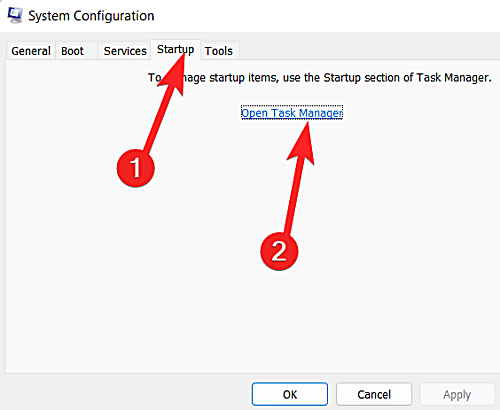
- Select the option “Open Task Manager” here.
- On the menu on the left of the screen, select Startup Apps to bring up a list of all the apps that open when you switch your device ON.
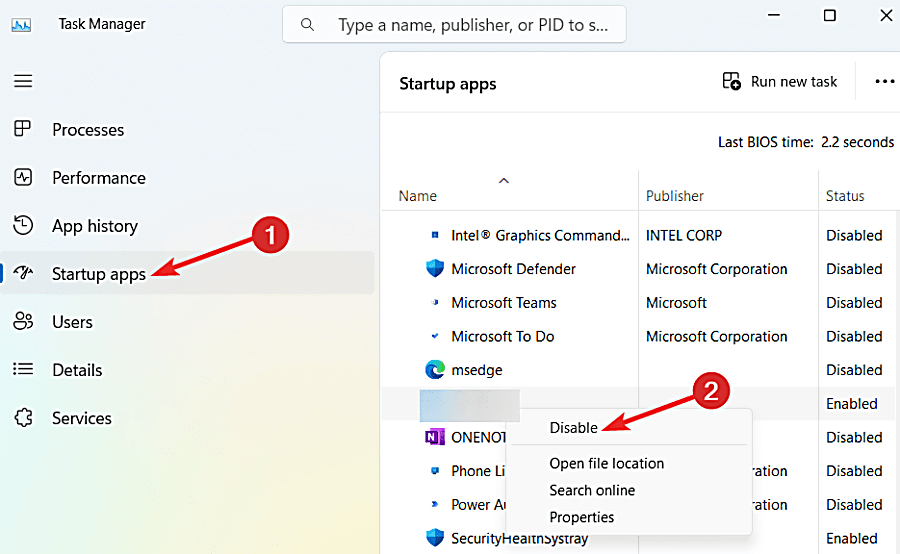
- Choose one of these apps and select the option to Disable. Repeat this step for any other startup apps that you think might be causing you trouble. You can test individual startup apps to check if it is responsible for the issues in your device and then easily switch them back once you find the troublesome app.
- Return to the System Configuration window, and hit OK to save all the changes that you made.
As none of these fixes are too difficult to follow, we hope that these methods work for you and your Windows 11 device is able to connect to a cellular network of your choice without issues. If you learned how to fix cellular option in Windows 11, then please do share this article with your friends and family.