In today’s fast-paced world to connect families, we use facilities such as conference calls and group texts to get in touch with everyone at the same time. Unfortunately, iPhone users cant take advantage of these facilities. If you are an iPhone user and you want to create contact group in iPhone you can do so, by using other applications such as iCloud.
Even at times when you want to send a party invite to all your family members or friends, or you want to discuss your next office team meeting, contact groups come in handy and make your work a lot easier. Using such applications to create contact group in iPhone is easy.
If you are creating a contact group on your iPhone using different applications, the people who are a part of your group can send you their message even if the “do not disturb” mode of your phone is on.
So, here’s a complete guide for all iPhone users, with step-by-step instructions to create your very own contact group.
Steps To Create Contact Group In iPhone
You can create a contact group on the iPhone via two methods:
1. Create a contact group using the Groups App
If you want to create a contact group on your iPhone you can use the Groups App. This useful and efficient application is available for free, on the Apple App Store. It was created by Facebook for all the iPhone users to create a group on their iPhone easily.
If you want to create a contact group on your iPhone using the Groups App here are some easy steps, to do so in a jiffy.
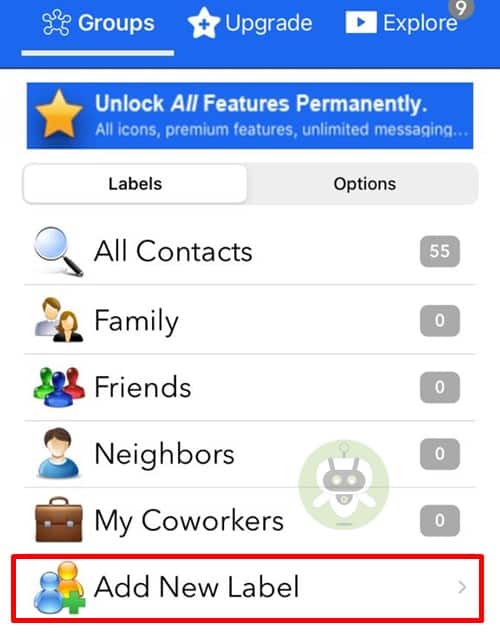
- Download the Groups App from Apple App Store for free.
- Open the application, once installed.
- If you want to create a new group on your iPhone click on the option “Add new label“.
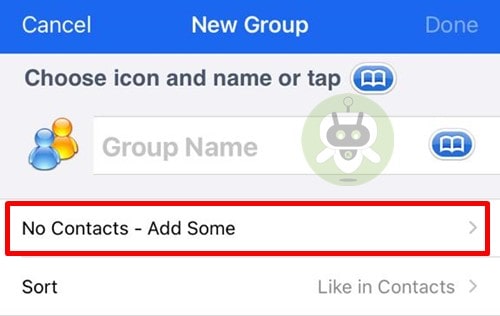
- Now, tap on No Contacts – Add Some.
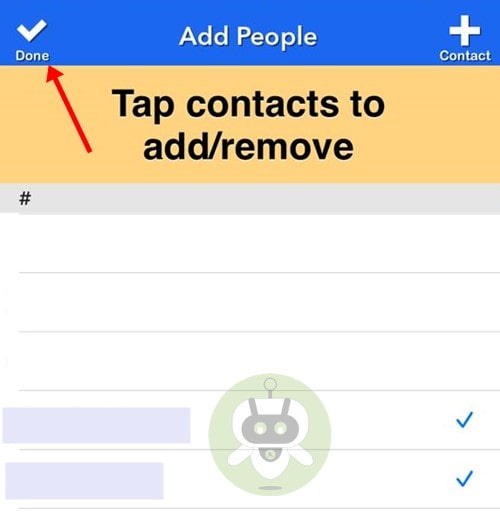
- Select your preferred contacts, and then you can start adding new contacts to your iPhone contact group. In the end, just click on “Done” and your contact group is ready.
2. Creating Contact Group Using iCloud
iCloud is one of the world’s largest cloud storage and backup service available exclusively to Apple device owners using iOS or macOS. If you want to create a contact group in iPhone using iCloud first you need to go to Settings and enable your contact sync.
This enables you to create a backup of your contacts. Then you need to follow these simple steps to create a contact group.
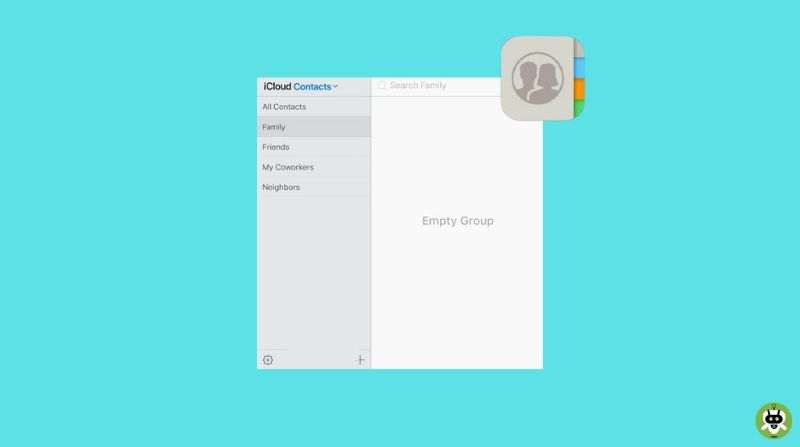
- Visit iCloud.com from your iOS or Mac device.
- Next step is to select Contacts and press the “+” icon at the bottom left corner.
- Select the New group option.
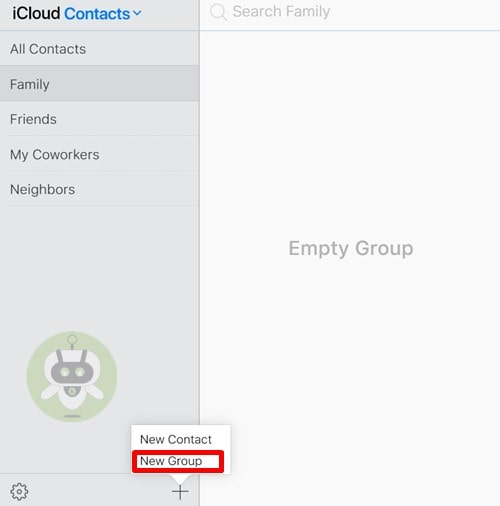
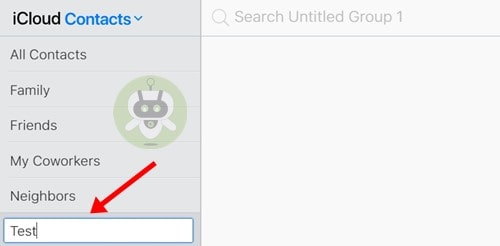
- Then you can “Name the group” and your group is ready.
Manage a group, using iCloud
If you are not happy with your created group or you want to delete a particular contact from your group you can do both from your iPhone just by clicking on the ‘Actions’ menu after selecting the contact or the group you want to delete.
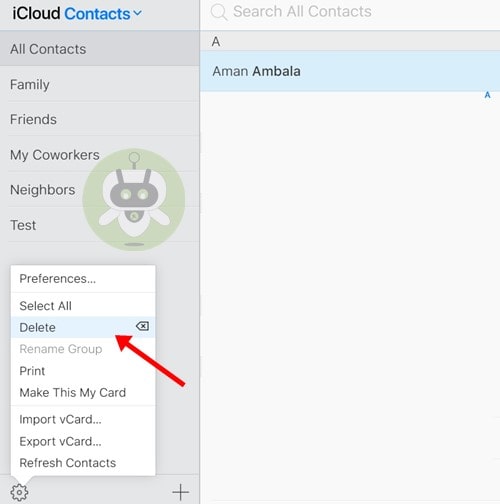
Then you can go to the delete option and confirm the group or the contact you want to delete. Once you confirm the group or the contact will be deleted without any kind of hassle.
So even if you own an iPhone and want to create a group on your mobile you don’t need to worry you can easily create or delete a contact group using iCloud or using any other application even if iOS doesn’t allow a contact group. You will not face any kind of problem with this contact group created by a third party application.
Conclusion
After creating a contact group on your iPhone you are free to use it anytime you want. You can also create different groups for different purposes. Now you can easily share anything you want with your entire family or friends group without any kind of hassle, even if you own an iPhone.
Creating a contact group is not difficult. You can always do so, with the help of different applications that are available on the App Store. These applications have both paid and unpaid versions and will give you different options to create a contact group on iPhone or on your iOS system.
The limit for people in iMessage group text on iPhone is up to 25 people.
Yes, they require data to send messages as they are MMS (Multimedia Messaging Service).
To activate your phone number, go to Settings > Apple ID > Name, Phone Numbers, E-mail. Now at the Reachable Section, add a number that you want to activate.